
DIY Guide: How To Measure Loft Of A Golf Club At Home Easily
Can you measure your golf club’s loft at home? Yes, you can do it easily. The golf club loft angle is how much the clubface leans back from a straight up-and-down line. It’s the angle of the clubface. Checking your golf club loft yourself can help you play better. This guide will show you simple ways to check golf club loft without fancy tools.
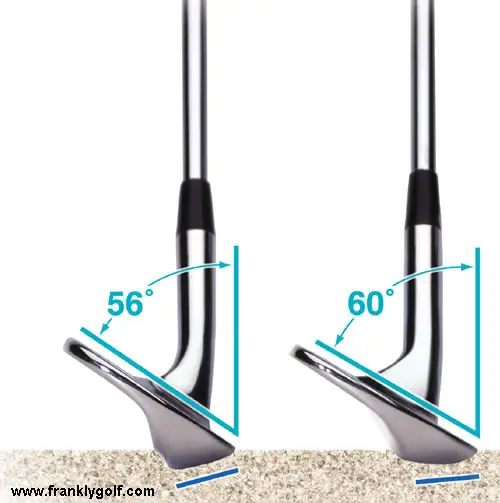
Image Source: franklygolf.com
Why Knowing Your Loft Matters
Knowing your golf club loft angle is very important. It affects how far your ball goes. It also changes how high the ball flies. Every golf club has a different loft. This helps you hit the ball different distances.
Think about your golf bag. You have a driver, woods, irons, and wedges. Each club has a set loft. These lofts are part of your club fitting specs. But sometimes, these lofts can change. Clubs can bend a little over time. This happens from hitting balls or from how you carry them.
If your club’s loft changes, your shots might not go where you want. A little change can make a big difference. For example, if your 7-iron has too much loft, your shots might go too high and not far enough. If it has too little loft, shots might go too low and roll too much. Checking your golf club head angle helps keep your clubs right. This lets you play your best golf. It makes your clubs work together as they should.
What Tools You Need
You do not need a special loft lie machine for simple DIY club loft measurement. You can use everyday things you might already have. Here is a list of simple tools for checking your club’s loft at home:
- A flat, stable surface: A sturdy table or workbench works well. It must not wobble.
- A ruler or straight edge: A metal ruler works best. It needs to be straight and stiff.
- A protractor: This is a tool to measure angles. A large one is better for golf clubs. Look for one that is half-circle or full-circle.
- A level: A small spirit level or a digital level works. This helps make sure your club is straight.
- A square: A carpenter’s square or framing square is good. This helps make sure things are at a 90-degree angle.
- A marker or pen: For marking the club.
- Tape (like masking tape): To hold things in place.
- Paper and pen: To write down your numbers.
- A flashlight (optional): For better light.
For more exact results, some people use a digital loft gauge. This tool gives numbers on a screen. But you can get good results with simple tools too. We will focus on easy home methods.
Getting Ready to Measure
Before you start measuring, a few steps help make sure your numbers are good. Proper setup is key for any static loft measurement.
- Clean Your Clubs: Make sure your clubface is very clean. Dirt or grass can change your numbers. Use a wet cloth to wipe it. Dry it well.
- Find a Good Spot: You need a flat, steady surface. A kitchen table or workbench is often good. Make sure it does not shake. You need good light too. This helps you see the lines and numbers clearly.
- Get Your Tools Ready: Lay out your ruler, protractor, and other tools. Make sure they are easy to reach.
- Know Your Club: Pick one club to start with. Make sure it is clean.
Method 1: The Protractor and Ruler Method (Static Loft Measurement)
This is a good way for DIY club loft measurement. It uses simple tools. This method measures the static loft. This is the angle of the clubface when the club is not moving.
Step 1: Set Up Your Work Area
- Place your sturdy table or workbench in a well-lit area.
- Make sure the table is perfectly flat. Use your level to check. If it’s not flat, put thin shims (small flat pieces of wood or cardboard) under the legs until it is. This is important for getting the right golf club head angle.
Step 2: Prepare the Club
- Lay the golf club flat on the table.
- The sole (bottom) of the clubhead should sit flat on the table.
- The clubface should be facing up.
- The shaft should be mostly flat on the table as well. You want the club to lie as if it were sitting on the ground, ready to be hit. This is important for a correct static loft measurement.
Step 3: Draw a Baseline
- Take your square. Place one edge against the club’s leading edge (the very bottom edge of the clubface).
- The other edge of the square should run straight back onto the table.
- Use your marker or pen to draw a straight line on the table. This line should be right under the leading edge of the clubface. This is your “zero line.” It represents the point where the clubface meets the ground. This line helps you find the correct golf club head angle.
Step 4: Draw a Vertical Line
- Now, you need a line that goes straight up from the table. This line will help you measure the angle.
- Stand the club upright. Put the sole flat on the table again.
- Hold a straight ruler or the straight edge of your square perfectly straight up, touching the leading edge of the clubface. It should be at a 90-degree angle to the table.
- Use your level to make sure the ruler is straight up.
- Draw a line on the table from the leading edge, straight out, away from the club. This line will be 90 degrees to your club’s leading edge when the club is standing up perfectly straight. This acts as your vertical reference.
Step 5: Measure the Angle with Your Protractor
- Lay the club flat again, with the sole on the table. Make sure the leading edge is on your “zero line.”
- Place your protractor on the table. The center of the protractor needs to be exactly on your “zero line,” right where the leading edge of the club is.
- Line up the flat, bottom edge of the protractor with your “zero line” on the table.
- Now, look at the clubface. The golf club loft angle is the angle between the clubface and your vertical line.
- Hold your ruler or straight edge against the face of the club. Make sure it lies perfectly flat against the clubface.
- Read the angle on the protractor where your ruler crosses it. This is your golf club loft angle.
- It’s like finding the angle of the clubface relative to a straight-up wall.
Step 6: Write Down Your Numbers
- Write down the loft angle you measured.
- Also, write down which club it was.
- You might want to measure it two or three times. Take the average number. This helps make sure your measurement is correct.
Example Table for Recording Lofts
Use a table like this to keep track of your club lofts.
| Club Type | Measured Loft (Degrees) | Standard Loft (Degrees) | Difference (+/-) | Notes (e.g., new grip, bent) |
|---|---|---|---|---|
| Driver | 9.0 – 12.0 | |||
| 3-Wood | 15.0 – 16.5 | |||
| 5-Wood | 18.0 – 19.5 | |||
| 3-Iron | 20.0 – 21.0 | |||
| 4-Iron | 23.0 – 24.0 | |||
| 5-Iron | 26.0 – 27.0 | |||
| 6-Iron | 30.0 – 31.0 | |||
| 7-Iron | 34.0 – 35.0 | |||
| 8-Iron | 38.0 – 39.0 | |||
| 9-Iron | 42.0 – 43.0 | |||
| PW (Pitching Wedge) | 46.0 – 47.0 | |||
| GW (Gap Wedge) | 50.0 – 52.0 | |||
| SW (Sand Wedge) | 54.0 – 56.0 | |||
| LW (Lob Wedge) | 58.0 – 60.0 |
Note: Standard lofts can vary slightly by brand and model. These are general guidelines.
Method 2: The Digital Level/Angle Finder Method
This method is a bit easier if you have a digital level or angle finder. These tools give you a number right away. They are good for a quick check golf club loft.
Step 1: Prepare Your Work Area
- You still need a very flat and stable surface.
- Make sure your digital level or angle finder is set to zero (calibrated) on this flat surface. Most have a button to do this. This makes sure your starting point is truly zero.
Step 2: Position the Club
- Place the club on the table. The sole (bottom) of the clubhead should be flat against the table.
- The clubface should point straight up.
- You need to make sure the club is not leaning side to side. You want the face to be perfectly straight up. You can use a square to help here. Put one side of the square on the table and the other against the back of the clubhead. This helps keep the club square.
Step 3: Measure the Angle
- Take your digital level or angle finder.
- Carefully place the flat edge of the digital level onto the clubface. It must sit flat on the clubface.
- Make sure it is centered on the face.
- Read the number on the screen. This number is your golf club loft angle.
- Make sure you are reading the angle from vertical. Some tools can read from horizontal or vertical. You want the one that shows the angle away from a perfectly straight up-and-down line. If your tool gives an angle from horizontal, subtract that number from 90 degrees to get the loft. For example, if it reads 55 degrees from horizontal, your loft is 90 – 55 = 35 degrees.
Step 4: Record Your Measurement
- Write down the loft angle for each club in your table.
- Measure each club a few times for the best results.
Key Concepts for Golf Club Loft
Knowing about static loft is good. But there are other ideas to know too.
Static Loft vs. Dynamic Loft
- Static Loft Measurement: This is what we measure at home. It is the angle of the clubface when the club is still.
- Dynamic Loft: This is the angle of the clubface at the exact moment you hit the ball. This can be different from static loft. It changes based on your swing. A professional club fitter uses special machines to measure dynamic loft. We cannot measure dynamic loft easily at home. But static loft is a good starting point. It tells you what the club is designed to do.
Loft and Lie Interaction
- Loft: The angle of the clubface up and down.
- Lie Angle: This is the angle between the shaft of the club and the sole of the club. It affects how the club sits on the ground at impact.
- Measuring golf club lie is also important. If your lie angle is wrong, you might hit the ball left or right, even if your loft is correct.
- Loft and lie work together. A professional club fitter uses a loft lie machine to change both. These machines bend the club to change the angles. You cannot do this at home. But knowing your loft and lie numbers is helpful for club fitting specs.
Golf Club Specifications
Each golf club comes with specific golf club specifications from the factory. These specs include the loft, lie angle, length, and swing weight. Over time, these specs can change slightly.
- Hitting balls can bend the hosel (the part where the shaft meets the clubhead).
- Carrying clubs in your bag can also cause small bends.
- Even temperature changes can make tiny differences.
That is why it is good to check golf club loft every so often. If you notice your shots are not flying right, a loft check is a good first step. It is part of taking care of your clubs.
What to Do with Your Measurements
Once you have measured all your clubs, look at your table.
- Compare to Standard Lofts: Look at the “Standard Loft” column. Are your numbers close?
- Look for Gaps: Do you have big gaps in loft between clubs? For example, is there a 6-degree jump between your 7-iron and 8-iron, but only a 3-degree jump between your 8-iron and 9-iron? Big gaps can mean you have trouble hitting certain distances.
- Look for Overlap: Do two clubs have almost the same loft? This means they might go the same distance. You might not need both clubs.
If you find big differences, or if many clubs are off, it might be time to visit a professional club fitter.
When to See a Professional
You can do a good DIY club loft measurement at home. But there are times when you should see an expert.
- You want to change lofts: You cannot bend a club at home. A professional uses a loft lie machine to safely adjust the golf club loft angle and lie angle.
- You need club fitting specs: A professional fitter can measure your swing. They can see how your swing affects the dynamic loft. They can then adjust your clubs for your best performance.
- You have major problems: If your shots are very inconsistent, or if your clubs feel wrong, a full club fitting is a good idea. They have advanced tools like a digital loft gauge that give very precise numbers.
Think of it like this: You can check your car’s oil at home. But if the engine makes a strange noise, you take it to a mechanic. Measuring loft at home is like checking your oil. It gives you good basic information.
Final Thoughts on Measuring Your Clubs
Measuring your golf club loft at home is a simple yet powerful way to learn about your equipment. It helps you understand your golf club specifications better. It makes you more aware of how your clubs should perform. By taking the time for DIY club loft measurement, you can ensure your clubs are working for you, not against you. A proper golf club head angle for each club is important for consistent and accurate shots. So, get out your tools, follow these steps, and start checking your golf club lofts today!
Frequently Asked Questions (FAQ)
Q1: How often should I check my golf club loft?
A1: It is a good idea to check your golf club lofts at least once a year. If you play often or travel a lot with your clubs, checking them more often (e.g., every six months) can be beneficial. Also, check them if you notice a sudden change in how far your ball goes or how it flies.
Q2: Can I adjust the loft of my golf clubs at home?
A2: No, you should not try to adjust the loft of your golf clubs at home. Golf clubs are made of strong metal. Changing their angles requires special tools called a loft lie machine. Trying to bend them yourself can damage the club. This damage can make the club unusable. Always go to a professional club fitter for adjustments.
Q3: Does the golf club’s lie angle affect its loft?
A3: The lie angle does not directly change the static golf club loft angle. However, the lie angle affects how the club sits on the ground when you hit the ball. If the lie angle is wrong, it can make the clubface point left or right. This can make the ball go off target. Loft and lie work together. They are both key golf club specifications for good shots.
Q4: Is a digital loft gauge better than a protractor for home use?
A4: A digital loft gauge can be more accurate and easier to read. It gives a precise number on a screen. However, a protractor method is still very effective for DIY club loft measurement. It can give you results that are good enough for most home checks. It costs much less. Both methods let you check golf club loft well.
Q5: What are standard golf club loft angles for irons?
A5: Standard iron lofts have changed over time. Newer irons often have “stronger” lofts. This means less loft, so the ball goes farther. For example, a modern 7-iron might have 30-32 degrees of loft. An older 7-iron might have 34-35 degrees. Always check your club’s specific golf club specifications if you can. The table in this guide gives general ranges.