
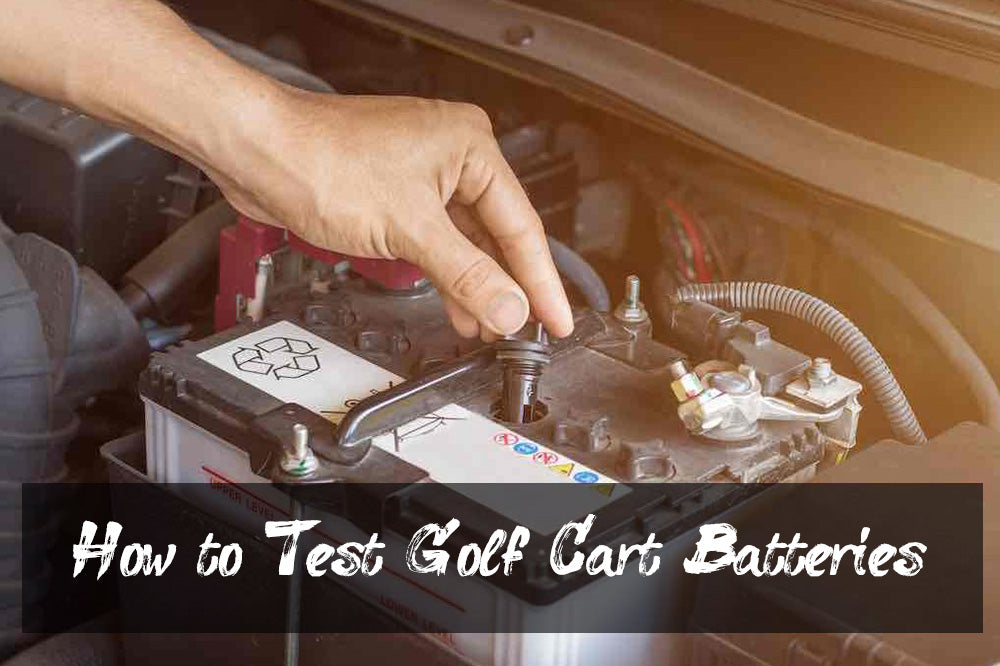
Image Source: www.vatrerpower.com
How To Test Golf Cart Battery: Your Easy Step-by-Step Guide
You test golf cart batteries by checking their voltage, specific gravity, and how well they work under a load. Golf cart battery health means how well your battery holds power and runs your cart. Testing helps you find problems early. This keeps your cart running well. This guide will show you how to test your golf cart batteries easily. We will go step-by-step.
Why Check Your Golf Cart Battery?
Your golf cart needs good batteries. They give power for driving. Batteries get old over time. They can lose their power. Checking them often is smart. It helps you see problems early. This can save you money. You might fix a small issue. You avoid buying new batteries too soon.
Poor battery health causes problems. Your cart may go slower. It may not go as far. It might not start at all. These are signs of battery trouble. You might see battery sulfation signs. This is when crystals grow on the battery plates. It stops them from working well. Golf cart charging issues also point to problems. Your charger may work hard. But the batteries do not get full. Regular checks keep your cart ready to go. They make sure you have power when you need it.
Tools You Will Need
You need a few simple tools. They help you check your batteries. These tools are easy to find.
- Safety Gear:
- Safety glasses.
- Gloves.
- Old clothes (battery acid can stain).
- Voltmeter: This tool checks voltage. It tells you how much power is there. A digital one is best. It gives exact numbers. This is key for voltmeter golf cart troubleshooting.
- Hydrometer: This tool checks battery fluid. It measures specific gravity. This tells you how much acid is in the water. This tool is important for specific gravity battery test. It shows the health of each cell. You use it for hydrometer use golf cart tasks.
- Battery Terminal Brush or Wire Brush: For cleaning battery posts.
- Baking Soda and Water: For cleaning battery acid spills. Mix one cup baking soda with one gallon water.
- Distilled Water: For topping off battery cells. Do not use tap water.
- Wrench or Pliers: To loosen battery cables if needed.
Safety First!
Working with batteries needs care. They hold strong power. They also have acid. Acid can burn skin and eyes. Follow these safety rules.
- Wear Safety Gear: Always wear safety glasses and gloves.
- No Sparks: Do not smoke near batteries. Keep flames away. Batteries make gas. This gas can explode.
- Good Air: Work in a place with fresh air.
- Clean Up Spills: If acid spills, use baking soda and water. Pour it on the spill. It makes the acid safe. Then rinse with water.
- Remove Jewelry: Take off rings or watches. They can cause a short circuit. This means a direct path for power. It can cause burns.
- Keep Tools Safe: Do not let metal tools touch both battery posts at once. This can cause sparks.
- Turn Off Cart: Make sure your golf cart is off. Remove the key. Put the cart in tow mode if it has one. This stops power from flowing.
Step-by-Step Battery Testing Methods
You can check your golf cart batteries in a few ways. Each way tells you something different. Doing all tests gives you the full picture.
Method 1: Visual Inspection
Start by looking at your batteries. This quick check can show many problems.
What to Look For
- Cleanliness: Are the tops of the batteries clean? Dust and dirt can make power leak. This drains your batteries.
- Cables and Terminals: Look at the battery cables. They connect the batteries. Are they tight? Are they clean? Look for corrosion. This looks like a white or blue fuzzy powder. It often builds up on the battery posts. Dirty battery terminals are a common problem.
- Swelling or Cracks: Check the battery cases. Are they puffed up? Are there any cracks? Swelling or cracks mean a bad battery.
- Fluid Leaks: See any wet spots? This could be battery acid leaking. Leaks are dangerous. They also mean a bad battery.
- Fluid Level: Take off the caps on each cell. Look inside. Is the fluid covering the plates? The plates are metal parts inside. They should be fully covered.
Action for Visual Problems
- Cleanliness: If dirty, wipe the tops with a damp cloth. Use baking soda water for acid residue.
- Corrosion: Clean corroded terminals. This is important for battery terminal cleaning golf cart.
- Unplug the main power if possible.
- Loosen the cables.
- Use a wire brush or battery terminal brush. Scrub off the corrosion.
- Mix baking soda and water. Make a paste. Put it on the corrosion. Let it fizz. Rinse with clean water. Dry well.
- Reattach cables tightly. Put a thin coat of battery grease or protector on terminals. This helps stop new corrosion.
- Low Fluid: If fluid is low, add distilled water. Do not overfill. Fill to about 1/4 inch below the fill hole.
- Swelling or Cracks: If you see these, the battery is bad. You must replace it.
Method 2: Voltmeter Test (Static Voltage)
This test checks the total power of your battery pack. It also checks each battery. Do this test after the cart has rested. Let it sit for at least 12 hours. Do not charge it before the test. This gives a true reading. This is voltmeter golf cart troubleshooting.
How to Use Your Voltmeter
- Set Up: Turn on your voltmeter. Set it to DC Volts (V with a straight line, or “DCV”). Choose a range higher than your golf cart’s voltage. For a 36V cart, use 40V or higher. For a 48V cart, use 50V or higher.
- Check Total Pack Voltage:
- Put the red (positive) probe on the main positive (+) terminal of the first battery in the series. This is usually where the main power cable leaves the battery pack.
- Put the black (negative) probe on the main negative (-) terminal of the last battery in the series. This is where the main power cable connects back to the cart.
- Read the number on the screen. This is your total pack voltage.
- Check Individual Battery Voltage:
- Start with one battery. Put the red probe on its positive (+) terminal.
- Put the black probe on its negative (-) terminal.
- Read the number. Write it down.
- Do this for every single battery in your pack.
Interpreting Your Readings
Look at the numbers you wrote down.
- Total Pack Voltage:
- For a 36V cart, a full charge is about 38.2 – 38.6 volts.
- For a 48V cart, a full charge is about 50.9 – 51.3 volts.
- These numbers can vary slightly. Check your cart’s manual for exact full charge voltages.
- Individual Battery Voltage:
- Each 6V battery should read around 6.37 to 6.42 volts.
- Each 8V battery should read around 8.49 to 8.56 volts.
- Each 12V battery should read around 12.7 to 12.8 volts.
Golf Cart Battery Voltage Chart (Approximate Full Charge Readings)
| Battery Type | Full Charge Voltage (Resting) | Low Charge (Needs Charge) | Very Low (Problem) |
|---|---|---|---|
| 6V Battery | 6.37 – 6.42V | Below 6.2V | Below 6.0V |
| 8V Battery | 8.49 – 8.56V | Below 8.2V | Below 8.0V |
| 12V Battery | 12.7 – 12.8V | Below 12.4V | Below 12.0V |
| Total Pack Voltage | Full Charge (Resting) | Low Charge (Needs Charge) | Very Low (Problem) |
|---|---|---|---|
| 36V System | 38.2 – 38.6V | Below 36.5V | Below 36V |
| 48V System | 50.9 – 51.3V | Below 49.0V | Below 48V |
| 72V System | 76.3 – 76.9V | Below 73.5V | Below 72V |
- What if a battery is much lower than others? This is a weak battery. It might need charging. It might be bad.
- What if all are low? The whole pack needs charging. Or the charger has a problem. This points to golf cart charging issues.
Method 3: Specific Gravity Test (Hydrometer)
This test is the best way to find a bad cell. A cell is one section of a battery. Each battery has several cells. For example, a 6V battery has three cells. An 8V battery has four cells. A 12V battery has six cells. This test checks the fluid in each cell. This is the specific gravity battery test. It uses a hydrometer.
What Specific Gravity Means
Specific gravity measures how dense the battery fluid is. This fluid is called electrolyte. It is a mix of sulfuric acid and water. When a battery charges, more acid goes into the water. When it discharges, more water forms. So, a higher specific gravity means more charge. A lower number means less charge. This tells you the health of each cell.
How to Use a Hydrometer
- Charge Batteries Fully: Do this test only after a full charge. A full charge gives true readings.
- Open Cells: Carefully remove the caps from each cell.
- Draw Fluid: Put the hydrometer’s tip into a cell. Squeeze the bulb. Let go. Fluid will draw into the hydrometer.
- Read the Float: A float inside the hydrometer will rise. Read the number where the fluid line meets the float.
- Record: Write down the reading for that cell.
- Clean: Squeeze the fluid back into the cell. Rinse the hydrometer with clean water after each use.
- Repeat: Do this for every single cell in every battery.
Interpreting Your Readings (Specific Gravity)
Readings can be tricky. Look for differences.
- Good Cell: A fully charged cell should read between 1.265 and 1.275.
- Low Cell: If a cell reads much lower (e.g., 1.200 or less), it is weak. It may be failing.
- Big Differences: If one cell is very different from the others (e.g., 0.050 lower), that cell is likely bad. It drags down the whole battery.
Specific Gravity Chart (Approximate Full Charge)
| State of Charge | Specific Gravity Reading |
|---|---|
| 100% Full | 1.265 – 1.275 |
| 75% Full | 1.225 – 1.250 |
| 50% Full | 1.190 – 1.215 |
| 25% Full | 1.155 – 1.180 |
| Dead/Bad Cell | 1.100 or lower |
- If you find one or two cells that are much lower than the others, that battery needs attention. It might be sulfated. Or it might be failing.
Method 4: Load Test
A load test checks how your batteries perform under work. It sees if they can deliver enough power. This is the golf cart battery load test.
Simple Load Test (DIY)
You can do a simple load test yourself.
- Charge Fully: Make sure your batteries are fully charged.
- Drive: Drive your golf cart on a known path. Drive it up a hill if possible. Drive it for a few minutes.
- Check Power: While driving, does the cart slow down a lot? Does it struggle? Does it stop?
- Listen: Do you hear clicking or straining sounds?
- Re-check Voltage: After driving, let the cart rest for 15-30 minutes. Re-check the total pack voltage. Did it drop a lot?
Interpreting Simple Load Test
- Good: If your cart runs strong and keeps its speed, batteries are likely fine. The voltage drop after the drive should be small.
- Bad: If your cart slows down fast, struggles on hills, or the voltage drops quickly after a short drive, your batteries are weak. This is a sign they cannot handle a load. They might be nearing the end of their life.
Professional Load Test (More Accurate)
A professional battery load tester can give more exact numbers. It puts a specific “load” (power demand) on the battery. Then it measures the voltage drop. These testers are expensive. Most people do not own them. A golf cart repair shop will have one. If your DIY load test hints at a problem, a professional test can confirm it.
Interpreting Your Results
Putting all your test results together helps you decide.
- All Tests Good: Batteries look clean. Voltage readings are high and even. Specific gravity readings are high and even. Cart runs strong under load.
- Meaning: Your batteries are in good health. Keep up with maintenance.
- Visual Problems (Corrosion, Low Fluid) but Electrical Tests Good:
- Meaning: Your batteries need cleaning and water. This is common. Fix these issues first. Re-test after cleaning and adding water. Regular battery terminal cleaning golf cart and fluid checks extend life.
- Low Voltage on One Battery (or uneven Specific Gravity):
- Meaning: You have a weak battery. One bad battery can drag down the whole pack. It acts like a broken link in a chain.
- Action: Try charging that single battery if you can. Or try a “balance charge” for the whole pack. If it stays low, replace that battery. But it is often best to replace all batteries at once. Mixing new and old batteries is not good.
- All Batteries Low Voltage (and/or low Specific Gravity):
- Meaning: Your whole pack is weak. It might be due to poor charging. It might be old age.
- Action: Check your charger. Is it working right? Are there golf cart charging issues? If the charger is fine, your batteries are likely worn out. It is time for new ones.
- Fails Load Test:
- Meaning: Batteries cannot give enough power when needed. Even if static voltage looks okay, they are failing under use.
- Action: Batteries need replacing.
Common Battery Problems and Fixes
Knowing common issues helps you fix them or prevent them.
- Low Water Levels:
- Problem: The fluid (electrolyte) evaporates. Battery plates are exposed to air. This harms them.
- Fix: Add distilled water. Fill to 1/4 inch above plates or below the vent well. Check water levels often. Every 2-4 weeks is good.
- Dirty Terminals and Cables:
- Problem: Corrosion stops electricity flow. It makes batteries work harder.
- Fix: Regular battery terminal cleaning golf cart is a must. Use a wire brush and baking soda mix. Keep them tight and clean.
- Battery Sulfation Signs:
- Problem: Sulfation is a build-up of lead sulfate crystals. It happens when batteries are not fully charged. Or if they sit empty too long. These crystals stop the battery from holding a charge. This is a common cause of golf cart battery health decline.
- Signs: Batteries do not charge fully. They lose power fast. They get hot when charging. Specific gravity is very low.
- Fix: For mild sulfation, a special desulfating charger might help. For severe sulfation, batteries are usually ruined. Prevention is best: always charge batteries fully.
- Golf Cart Charging Issues:
- Problem: Your charger might be faulty. Or the charging port is bad. Or the cart’s wiring is weak. This leads to batteries not getting enough power.
- Signs: Batteries never reach full voltage. They die fast. Charger light does not come on or stays on too long.
- Fix: Check your charger. Test its output. Check charging cables. Sometimes a loose connection causes this. If charger is bad, replace it.
Keeping Your Batteries Healthy (Deep Cycle Battery Care)
Golf cart batteries are deep cycle batteries. This means they are made to be used until nearly empty. Then they are charged full again. Proper deep cycle battery care makes them last longer.
- Charge Regularly: Always charge your batteries fully after each use. Do not let them sit empty. Even a short ride needs a full charge afterwards.
- Avoid Over-Discharge: Do not run your cart until it dies. Stop when it feels weak. Recharging from too low hurts batteries.
- Check Water Levels: Check fluid levels every 2-4 weeks. Add distilled water as needed. Do this after charging. But do not overfill.
- Keep Them Clean: Regularly clean battery tops and terminals. This stops power leaks and corrosion. Remember battery terminal cleaning golf cart is vital.
- Use the Right Charger: Use a charger made for your battery type and voltage. An old or wrong charger can harm batteries.
- Store Properly: If storing your cart for months, fully charge batteries. Then charge them every 2-4 weeks. Store them in a cool, dry place. Avoid freezing. A battery maintainer (trickle charger) can be helpful during long storage.
- Do Not Mix Old and New: If one battery goes bad, it is often best to replace the whole set. New batteries will work harder to make up for old ones. This wears them out fast.
When to Call a Pro or Replace Batteries
Sometimes, tests show big problems.
- One Bad Battery: If one battery consistently shows very low voltage or specific gravity, it is likely bad. It will drag down the whole pack.
- Uneven Readings: If you have many batteries with very different readings, the pack is unhealthy.
- Fails Load Test Clearly: If the cart struggles or stops quickly under load, the batteries are failing.
- Old Batteries: Golf cart batteries last about 3 to 7 years. If yours are old and showing issues, it is time to replace them.
- Swelling, Leaks, or Cracks: These are clear signs of failed batteries. Replace them immediately.
- Mysterious Problems: If you have done all tests and cannot figure out the problem, call a professional. They have special tools. They can find hidden issues.
Replacing a full set of golf cart batteries is a big cost. But it is cheaper than being stuck far from home. Regular testing and care help you get the most from your investment.
Frequently Asked Questions (FAQ)
How often should I test my golf cart batteries?
You should visually check them every month. Check fluid levels too. Do a full voltmeter and specific gravity test every 3-6 months. Do a load test if your cart feels weak.
What do different voltage readings mean?
High voltage means a full charge. Low voltage means the battery needs charging. Or it could be weak. Check the golf cart battery voltage chart in this guide for exact numbers. If one battery is much lower than the others, it is usually a problem battery.
Can I mix new and old golf cart batteries?
No, it is not a good idea. New batteries are stronger. They will work harder to help the older, weaker ones. This makes the new batteries wear out faster. It is best to replace all batteries at the same time.
What causes golf cart batteries to go bad quickly?
Not charging them fully is a main cause. Letting them sit empty hurts them. Not checking water levels also causes harm. Overcharging can also damage them. Extreme heat or cold can shorten their life.
How long do golf cart batteries usually last?
With good care, golf cart batteries last 3 to 7 years. How often you use them also matters. Heavier use means shorter life. Good maintenance makes them last longer.