
Knowing the voltage of your golf cart batteries is key. It tells you how much power they have. It also helps you find problems early. Many people ask, “What voltage should a golf cart battery be?” This depends on your cart’s system. A fully charged 6-volt battery should be around 6.3-6.4 volts. A fully charged 8-volt battery is about 8.4-8.5 volts. A fully charged 12-volt battery is near 12.6-12.7 volts. We will show you how to check these numbers. You only need a simple tool called a voltmeter. This guide makes testing golf cart battery voltage easy.
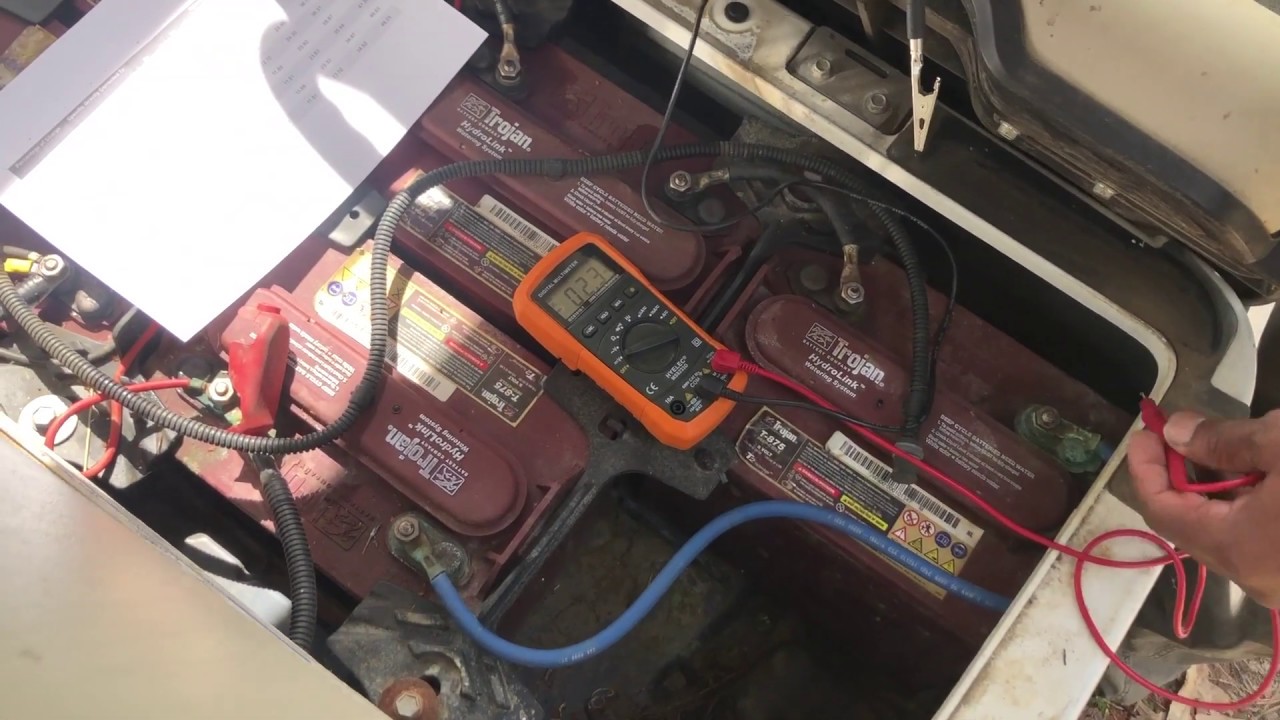
Image Source: i.ytimg.com
Why Checking Battery Health Matters
Golf cart batteries give power to your cart. They are like the heart of the cart. Over time, batteries get old. They hold less power. They can stop working right.
Testing your batteries helps you see this. You can find problems before they stop your ride. It’s like a check-up for your batteries.
Regular checking golf cart battery health saves you money. You can fix small issues. This stops big issues later. It helps your batteries last longer. It makes sure your cart runs strong.
If a battery is bad, it hurts the others. Testing helps you find the bad one. You can change just one. You don’t have to buy a whole new set right away.
Knowing the battery voltage is part of this check-up. It tells you the battery’s condition.
Tools You Need for Testing
You don’t need many tools. Most are easy to find.
- Voltmeter or Multimeter: This is the main tool. It measures voltage. A multimeter can measure other things too. We will focus on using a multimeter for golf cart batteries to check DC voltage. Make sure it reads DC volts. It should handle the voltage of your battery pack (36V or 48V usually).
- Safety Glasses: Battery acid is dangerous. Wear glasses to protect your eyes.
- Rubber Gloves: These protect your hands from acid and electric shock.
- Terminal Cleaning Tool or Wire Brush: Battery terminals can get dirty. Clean ones give a good connection. This makes the test results correct.
- Wrench or Socket Set: You might need this to clean or tighten battery connections.
- Rag or Shop Towel: To wipe things clean.
- Baking Soda and Water Mix: This cleans battery acid off surfaces. Keep it handy.
Safety First When Testing Batteries
Battery testing involves electricity. Batteries also have acid. You must be safe. Follow these steps every time.
- Wear Safety Gear: Always put on safety glasses and rubber gloves. This is very important.
- Work in a Safe Area: Test in a place with good air flow. Batteries can release gas when charging or working hard. Don’s test near sparks or open flames. This gas can catch fire.
- Keep Tools Safe: Use tools with insulated handles if you can. Do not let metal tools touch battery terminals. This can cause a short circuit. A short circuit is dangerous. It can cause sparks or fire.
- Disconnect Power (If Needed): For some checks, you might turn off the cart or put it in “tow” mode. This stops power flow. Check your cart’s manual.
- Clean Up Spills: If battery acid spills, clean it right away. Use the baking soda and water mix. It makes the acid safe. Then wipe it up with a rag. Dispose of the rag safely.
- Work on One Battery At a Time: When checking individual batteries, be careful. Only touch the terminals of the battery you are testing.
Being safe is the most important step. Do not skip it.
Deciphering Your Voltmeter
A voltmeter measures electrical pressure. We call this voltage. Golf cart batteries use DC voltage. DC means direct current.
Your voltmeter or multimeter will have settings.
- Find the DC voltage setting. It often has a ‘V’ with a straight line above it (V—).
- Choose a range that is higher than the voltage you expect.
- For testing a single 6V, 8V, or 12V battery, set it to 20V DC or similar.
- For testing golf cart battery pack voltage, you need a higher range.
- A 36V cart needs a range over 36V (like 50V or 100V DC).
- A 48V cart needs a range over 48V (like 50V, 100V DC, or 200V DC).
- Using a range too low won’t work. Using a range too high just makes the reading less exact.
- Your meter has two probes. One is red (positive +). One is black (negative -).
Knowing these basics helps you start how to use a voltmeter on golf cart batteries.
Readying Your Batteries Before You Test
You need to prepare the batteries first. This makes sure your voltage reading is correct.
- Charge the Batteries Fully: Connect your charger. Let it run until the batteries are 100% full. Most chargers turn off automatically. A full charge gives you a clear picture of battery capacity. This step is key for accurate golf cart battery voltage testing.
- Let Batteries Rest: After charging stops, wait. Wait at least 8-12 hours. This rest period is important. It lets the surface charge go away. Surface charge makes the voltage look higher than it really is. A rested voltage reading is more accurate for checking golf cart battery health.
- Clean Battery Terminals: Look at the metal posts on top of the batteries. Are they dirty? Do they have white or green stuff on them? That’s corrosion. Corrosion stops the meter from getting a good connection. Use your cleaning tool or wire brush. Clean the posts and the cable connectors. Make them shiny metal. If there’s a lot of corrosion, use the baking soda mix (one cup water, one tablespoon baking soda). Put a little mix on the corrosion. It will bubble. Let it bubble. Then clean it with a wire brush. Rinse with clean water. Dry everything well. Clean terminals mean you get a true reading golf cart battery voltage.
- Check Water Levels (For Flooded Batteries): If your batteries have caps you can remove, check the water inside. The metal plates inside need to be covered with distilled water. If low, add distilled water after charging and before resting. Do not add too much. Water expands when charging.
Your batteries are now ready for testing. They are clean, full, rested, and safe.
Testing the Entire Battery Pack
This test shows the total voltage of all your batteries together. This is testing golf cart battery pack voltage. It tells you the overall power level of your cart.
- Put Cart in Tow Mode: Find the “Run/Tow” switch on your cart. Set it to “Tow”. This turns off the power system.
- Set Your Voltmeter: Turn on your voltmeter. Set it to measure DC volts. Choose a range higher than your cart’s total voltage.
- For a 36V cart, use a range above 36V (like 50V DC).
- For a 48V cart, use a range above 48V (like 100V DC).
- Find the Main Terminals: Look at your battery pack. There will be one cable coming from the positive (+) post of the first battery in the series. There will be one cable going to the negative (-) post of the last battery in the series. These are the main output terminals for the whole pack. They might be thicker cables.
- Connect the Probes:
- Touch the red (+) probe of your voltmeter to the main positive (+) terminal of the battery pack.
- Touch the black (-) probe of your voltmeter to the main negative (-) terminal of the battery pack.
- Be careful! Only touch these two points. Do not touch any other wires or metal parts at the same time.
- Read the Voltage: Look at the voltmeter screen. It shows a number. This number is the total voltage of your battery pack. Write this number down.
What should this total voltage be? This is part of answering what voltage should a golf cart battery be. Remember, this is after a full charge and rest.
- For a 36V System (usually 6 x 6V batteries): A fully charged, rested pack should read around 38.0 – 38.5 volts.
- For a 48V System (usually 6 x 8V or 4 x 12V batteries): A fully charged, rested pack should read around 50.0 – 51.0 volts.
If your total voltage is lower than these numbers, the pack is not holding a full charge. This could mean the charger has a problem, or one or more batteries are weak.
Testing Batteries One by One
Testing each battery is vital. It’s the best way of checking golf cart battery health. This step helps find a single weak battery. One bad battery can make the whole pack seem weak. This is testing individual golf cart batteries.
- Cart in Tow Mode: Make sure the cart is still in “Tow” mode.
- Set Your Voltmeter: Set your voltmeter to measure DC volts. Set the range for a single battery.
- For 6V batteries, set the range to 10V or 20V DC.
- For 8V batteries, set the range to 10V or 20V DC.
- For 12V batteries, set the range to 20V DC.
- Identify Each Battery: Your batteries are connected in a series. A cable goes from the negative (-) of one to the positive (+) of the next.
- Test the First Battery:
- Find the first battery in the series (where the main positive cable starts).
- Touch the red (+) probe of your voltmeter to the positive (+) terminal of this battery.
- Touch the black (-) probe of your voltmeter to the negative (-) terminal of this battery.
- Hold the probes steady for a few seconds.
- Read the voltage on the meter. Write it down. Mark which battery it was.
- Test the Next Battery: Move to the next battery in the series.
- Touch the red (+) probe to its positive (+) terminal.
- Touch the black (-) probe to its negative (-) terminal.
- Read the voltage. Write it down.
- Continue for All Batteries: Repeat this step for every battery in the pack. Be careful to connect red-to-positive and black-to-negative for each battery.
Interpreting Your Test Results
Now you have a list of voltages. You have the total pack voltage. You have the voltage for each individual battery. What do these numbers tell you? This is where you start interpreting what you learned.
Total Pack Voltage (After Full Charge & Rest):
- 36V Cart:
- 38.0 – 38.5 V: Excellent charge level and likely good health.
- 37.0 – 37.9 V: Good charge, but maybe not perfect. Could mean slight weakness or not fully charged.
- Below 37.0 V: The pack is not holding a full charge. There is likely a problem.
- 48V Cart:
- 50.0 – 51.0 V: Excellent charge level and likely good health.
- 49.0 – 49.9 V: Good charge, maybe slightly lower than perfect.
- Below 49.0 V: The pack is not holding a full charge. There is likely a problem.
Individual Battery Voltage (After Full Charge & Rest):
This is very important for checking golf cart battery health. Look at the individual voltages you wrote down.
- For 6V Batteries:
- 6.3 – 6.4 V: Excellent.
- 6.2 V: Good.
- Below 6.0 V: Getting weak.
- Much lower than others (e.g., 5.5V when others are 6.3V): This battery is likely bad.
- For 8V Batteries:
- 8.4 – 8.5 V: Excellent.
- 8.3 V: Good.
- Below 8.0 V: Getting weak.
- Much lower than others (e.g., 7.5V when others are 8.4V): This battery is likely bad.
- For 12V Batteries:
- 12.6 – 12.7 V: Excellent.
- 12.4 V: Good.
- Below 12.0 V: Getting weak.
- Much lower than others (e.g., 11.5V when others are 12.6V): This battery is likely bad.
Key Check: Compare the voltage of each battery to the others in the pack. If one battery’s voltage is significantly lower (more than 0.2V – 0.3V difference) than the others, that battery is probably the weak link. A weak battery makes the whole pack perform poorly. It needs to be replaced.
Linking Voltage to Battery State of Charge
Voltage also tells you the approximate golf cart battery state of charge. This is useful when you haven’t just charged the batteries. However, the “rested” voltage after a full charge is best for judging overall health.
Here are rough guides for State of Charge (SOC) based on voltage, after the batteries have rested for at least 12 hours:
Approximate State of Charge Table (Rested Voltage)
| System | 100% SOC | 80% SOC | 50% SOC | 20% SOC | 0% SOC |
|---|---|---|---|---|---|
| 36V Pack | 38.2V | 37.0V | 35.6V | 34.0V | 33.0V |
| 48V Pack | 50.9V | 49.0V | 47.0V | 45.1V | 44.0V |
| 6V Single | 6.37V | 6.25V | 6.15V | 6.04V | 5.8V |
| 8V Single | 8.49V | 8.33V | 8.15V | 8.00V | 7.7V |
| 12V Single | 12.7V | 12.4V | 12.2V | 12.0V | 11.7V |
(Note: These numbers are typical but can vary slightly by battery brand and age.)
Reading golf cart battery voltage helps you manage charging. Do not let batteries sit at a low state of charge for long. This harms them.
Troubleshooting Golf Cart Battery Issues
Voltage testing is a key step in troubleshooting golf cart battery issues. Your voltage readings can point to specific problems.
- Low Total Pack Voltage:
- Possible Causes: Charger problem (not charging fully), one or more weak batteries, poor connections (corrosion), old batteries.
- Troubleshooting Steps:
- Re-check the charger. Does it finish its cycle?
- Check all connections. Are they clean and tight?
- Look at individual battery voltages. Is one much lower than the others?
- One Battery Much Lower Than Others:
- Possible Cause: That single battery is failing. It might have an internal short, a bad cell, or be sulfated.
- Troubleshooting Steps: This battery likely needs to be replaced. Replacing just one battery can work, but it’s often best to replace batteries in pairs (if possible) or the whole set if they are old. A new battery with old ones can cause issues.
- Voltage Drops Fast During Use:
- Possible Cause: Batteries are old and losing capacity. They might test okay when fully charged and rested, but they can’t provide power under load.
- Troubleshooting Steps: The batteries are probably at the end of their life. They need replacement. You can do a “load test” with a special tool, but voltage testing helps point to this problem.
- Voltage Rises Very High When Charging:
- Possible Cause: Charger issue (overcharging) or a battery problem.
- Troubleshooting Steps: Stop charging. Check battery water levels carefully (only after batteries cool and settle). Check the charger operation. Overcharging is dangerous and harms batteries.
Using your voltmeter results helps you figure out the problem. Is it the charger? Is it one battery? Is the whole set old? Golf cart battery voltage testing gives you the answers.
Maintaining Your Batteries Well
Good care makes batteries last longer. Voltage testing is part of care. But do these things too:
- Charge Properly: Use the right charger for your batteries. Charge after each use, even short ones. Do not stop the charge cycle early. Fully charging is good.
- Check Water Levels: For flooded batteries, check water often. Add distilled water only after charging is done. Water should cover the plates. Do not overfill.
- Clean Terminals: Keep posts and cable connectors clean. Use the baking soda mix if needed. Clean connections are key for good performance and charging.
- Keep Batteries Clean: Wipe down the tops of batteries. Dirt or moisture can cause a slow discharge.
- Avoid Deep Discharge: Do not run the batteries completely dead often. This shortens their life. Watch your battery meter on the cart.
- Charge in a Cool Place: Charging creates heat. Charge in a place with good air flow.
These steps, along with regular golf cart battery voltage testing, help keep your batteries healthy.
How Often To Test Your Batteries
How often should you test?
- Monthly: A quick check of the total pack voltage (after charge and rest) is good.
- Every 3-6 Months: Do a full test. Check the total pack voltage and the voltage of each individual battery. This is a great way of checking golf cart battery health regularly.
- If You Notice Problems: If your cart feels slow, doesn’t go as far, or the charger acts strangely, test the batteries right away. Use voltage testing for troubleshooting golf cart battery issues.
Regular testing helps you catch problems early. Early fixing saves money later.
When to Call a Professional
Sometimes, you might need expert help.
- If You Are Not Sure: If you don’t feel safe, or you don’t understand the readings, ask for help.
- Complex Problems: If voltage testing doesn’t clearly show the issue, or if the problem seems bigger than a single weak battery, a golf cart service shop can help.
- Charger Problems: If you suspect the charger is faulty, a professional can test it.
- Replacing a Full Set: Changing a whole set of batteries is a big job. It involves heavy items and dangerous wiring. Many people choose to have a professional do this.
Testing with a voltmeter gives you great information. It empowers you to do many checks yourself. But it’s okay to get help when you need it.
Grasping Battery Health: A Summary
Testing your golf cart batteries with a voltmeter is not hard. It just takes a few steps and safety. You learned how to use a voltmeter on golf cart batteries. You learned how to check the total pack voltage. You also learned how to test individual golf cart batteries. You know what voltage should a golf cart battery be when healthy and full.
These tests help you in many ways. They are key for checking golf cart battery health. They are useful for troubleshooting golf cart battery issues. They give you a clear reading golf cart battery voltage. They help you understand your golf cart battery state of charge.
Make voltage testing part of your golf cart care. It helps your cart run better. It helps your batteries last longer. It saves you hassle and money in the future.
FAQ
h4: What is the difference between a voltmeter and a multimeter?
A voltmeter only measures voltage. A multimeter is a tool that can measure many electrical things. It can measure voltage (volts), current (amps), and resistance (ohms). For testing golf cart batteries, you only need the voltage function. So either tool works, as long as it measures DC voltage. Using a multimeter for golf cart batteries just means you use the voltage part of the meter.
h4: Can I test my golf cart batteries when they are low on charge?
Yes, you can. Testing a low battery shows its voltage when discharged. But for checking golf cart battery health and capacity, testing after a full charge and rest is best. It gives you a standard point to measure from. Testing when low on charge can help see if one battery drains faster than others.
h4: My batteries test okay, but the cart is still slow. What could be wrong?
If your batteries show good voltage after testing, the issue might be elsewhere. It could be the motor, the controller, the cables (even if clean, they can be bad inside), or even tire pressure. Voltage testing focuses on the power source. If the source seems fine, look at the parts that use or control the power. This goes beyond basic troubleshooting golf cart battery issues.
h4: How long do golf cart batteries usually last?
This depends on type, how you use them, and how well you care for them. With good care, standard flooded lead-acid golf cart batteries often last 5-7 years. Testing them regularly helps ensure you get the most life from them.
h4: Do I need special golf cart batteries?
Yes. Golf carts use deep-cycle batteries. These are designed to give power over a long time and be discharged partly or mostly many times. Car batteries are different; they give a strong burst to start an engine and then are kept full by the car. Using the wrong type will cause problems.
h4: What if one battery is bubbling a lot when charging?
This could be a sign of a problem. It might mean that battery is not accepting a charge correctly. Or the charger might be faulty. Check water levels after charging stops and things cool. If one battery acts very differently from others during charging, it could be weak or faulty. Use your voltmeter after rest to confirm its voltage compared to others. This is a sign for troubleshooting golf cart battery issues.
h4: Can I just replace one bad battery?
You can, but it’s not always the best choice. If the bad battery failed early, replacing just that one might work. But if the batteries are old, the other batteries are also worn. A new battery working with old, weaker batteries can shorten the life of the new battery. It’s often advised to replace batteries in sets or at least in pairs, especially if they are older than a couple of years. Voltage testing individual batteries helps you decide if just one is bad or if the whole set is worn.
h4: What is battery sulfation?
Sulfation happens when lead sulfate crystals build up on the battery plates. This stops the battery from holding a full charge. It is a common reason batteries lose capacity and fail. It often happens if batteries sit discharged for too long. Testing for low voltage on a rested battery can indicate sulfation or other internal problems. Checking golf cart battery health includes looking for signs of sulfation (though the voltage reading is the main test you can do yourself).
Testing your golf cart batteries is a simple task with big rewards. Use these steps to keep your cart running smoothly.