
Guide: How To Clean A Golf Cart Battery for Max Life
Your golf cart battery needs care. Cleaning it properly helps it last longer. It also makes your golf cart run better. Dirty batteries can lose power. They can even stop working. This guide will show you how to clean your golf cart battery step-by-step. We will also talk about how to keep it clean. This helps stop common problems like corrosion. Cleaning is key for a happy golf cart.
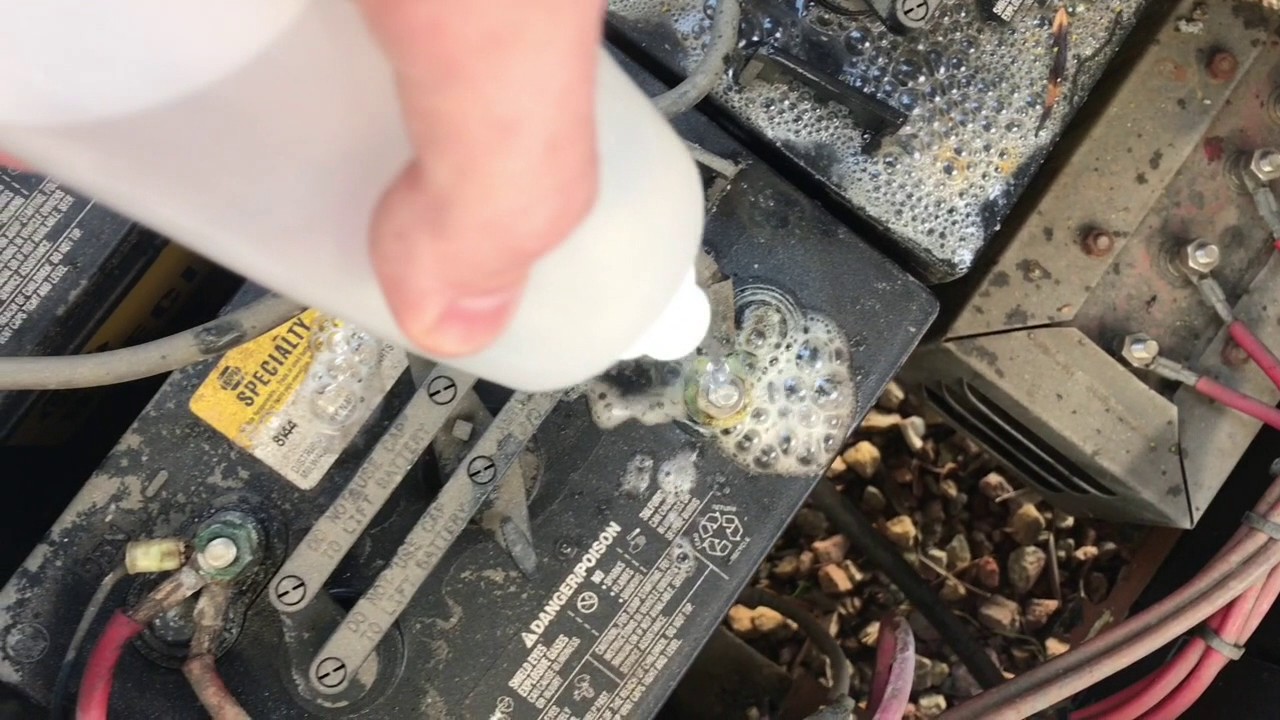
Image Source: i.ytimg.com
Why Your Golf Cart Battery Needs a Good Clean
Batteries work hard. They make power for your golf cart. Over time, dirt and acid can build up. This buildup can cause problems. It can make the battery work less well. It can even shorten its life.
Common Battery Problems:
- Corrosion: This looks like white or green powder. It forms on battery posts and cables. It stops power from flowing well. This means your golf cart runs slower. It might not go as far. Corrosion removal golf cart battery is a must-do task.
- Acid Leaks: Sometimes, a small amount of battery acid can leak. This happens if the battery is overfilled or gets too hot. Acid can eat away at parts of your golf cart. It can also hurt your battery tray.
- Dirt and Grime: Dust and dirt can mix with acid. This mix can make a path for electricity. This lets power drain from your battery. It makes your battery lose charge faster.
Cleaning helps fix these issues. It makes your battery last longer. It also keeps your golf cart reliable. Regular cleaning saves you money in the long run. You won’t need to buy new batteries as often.
Your Toolkit for a Clean Battery
Before you start cleaning, get your tools ready. Having everything at hand makes the job easier. It also makes it safer. Here is what you will need:
| Item | Why You Need It |
|---|---|
| Safety Glasses | Protect your eyes from acid splashes. |
| Acid-Resistant Gloves | Keep your hands safe from battery acid. |
| Old Clothes/Apron | Protect your clothing from acid. |
| Baking Soda | A key part of neutralize battery acid golf cart. |
| Water (Distilled or Tap) | For mixing with baking soda and rinsing. |
| Stiff Brush or Wire Brush | For scrubbing off corrosion. |
| Battery Terminal Cleaner | A special spray to remove stubborn grime. |
| Post Cleaner Tool | Cleans the battery posts and cable ends. |
| Wrenches (various sizes) | For loosening and tightening battery cables. |
| Clean Rags or Paper Towels | For wiping and drying. |
| Battery Hydrometer | To check golf cart battery electrolyte levels. |
| Battery Filler Bottle | For adding distilled water to cells. |
| Voltmeter | To check battery voltage. (Optional but helpful) |
| Old Toothbrush | For small, tight spots. |
| Non-Metallic Scraper | For scraping off hardened buildup. |
This list ensures you have the right golf cart battery cleaning tools. Using the right tools helps you do the job well. It also keeps you safe.
Safety First: Rules for Battery Cleaning
Battery acid is dangerous. It can burn skin and eyes. It can ruin clothes. Always put safety first. Follow these rules every time you work on your golf cart batteries:
- Wear Your Gear: Always wear safety glasses and acid-resistant gloves. An old shirt or apron is also a good idea.
- Work in a Well-Lit Area: You need to see what you are doing. Make sure there is plenty of light.
- Ensure Good Airflow: Work in a place with fresh air. Batteries can release hydrogen gas. This gas is explosive.
- No Sparks or Flames: Keep open flames, sparks, and smoking far away. This includes turning off your golf cart completely.
- Remove Jewelry: Take off rings, watches, and bracelets. Metal can cause a short circuit. This can lead to burns or damage.
- Have a Spill Plan: Keep baking soda and water nearby. This is your emergency cleanup mix.
Following these safety steps is crucial. It protects you. It protects your golf cart.
Preparing Your Golf Cart for Battery Cleaning
Before you touch anything, get your golf cart ready.
- Turn Off the Golf Cart: Make sure the key is out. Put the tow/run switch in the “tow” position. This stops power from flowing.
- Park Safely: Park the golf cart on a flat, level surface. Set the parking brake.
- Open the Battery Compartment: Lift the seat or open the cover. You need easy access to the batteries.
- Take a Photo: Snap a picture of the battery setup. This helps you remember how the cables connect. It makes putting them back easier.
Now you are ready to start the cleaning process.
The Step-by-Step Cleaning Process
Cleaning your golf cart batteries is a careful process. Take your time. Do each step right.
Step 1: Disconnect Battery Cables Safely
This is a very important step. You must disconnect cables in the right order. This prevents shocks and sparks.
- Find the Main Negative Cable: This cable goes from one of your batteries to the golf cart’s frame or motor. It is usually black.
- Disconnect the Main Negative First: Use a wrench. Loosen the nut on the negative terminal. Remove the cable. Make sure it does not touch any metal parts.
- Disconnect the Main Positive Cable: This cable usually connects to a larger electrical component or the controller. It is typically red. Loosen and remove it. Again, keep it away from metal.
- Disconnect Remaining Cables: Now, disconnect the smaller cables between batteries. Work from battery to battery. Take them off one by one. Keep track of which cable went where. Your photo will help.
Place all disconnected cables where they cannot touch battery terminals. This stops any accidental power flow.
Step 2: Initial Inspection and Loose Dirt Removal
Look at your batteries closely.
- Check for Damage: Look for cracks, bulges, or leaks. If a battery looks damaged, do not clean it. You might need to replace it.
- Brush Off Loose Dirt: Use a stiff, dry brush. Brush away any loose dirt, dust, or leaves. This makes the next steps cleaner.
Step 3: Tackle Battery Corrosion Removal
Corrosion is the main problem. It looks like white, blue, or green crust. It forms on the battery posts and cable ends. It stops electricity from flowing. Corrosion removal golf cart battery is vital for good power.
- Make Your Cleaning Solution: Mix baking soda and water. Use about 1 cup of baking soda for 1 gallon of water. Stir it well. It should be a thick paste or a milky liquid. This solution will neutralize battery acid golf cart.
- Apply the Solution: Pour or brush the baking soda mix onto the corroded areas. Make sure it covers all the gunk. You will see it fizz. This fizzing means it is working. It is breaking down the acid and corrosion.
- Let it Work: Let the solution sit for a few minutes. Give it time to bubble and clean.
- Scrub the Corrosion: Use your stiff brush or wire brush. Scrub the battery posts, terminals, and cable ends. Work hard to get all the corrosion off. An old toothbrush can help with tight spots.
- Use a Battery Terminal Cleaner (If Needed): For very stubborn corrosion, use a special battery terminal spray cleaner. Follow the directions on the can.
Step 4: Clean Battery Terminals and Posts
Once the corrosion is mostly gone, it is time for a detailed battery terminal cleaning golf cart.
- Clean Battery Posts: Use a battery post cleaner tool. This tool cleans the round posts of the battery. Twist it on the post until it shines.
- Clean Cable Ends: Use the other end of the battery post cleaner tool. It cleans the inside of the cable ends. Make sure they are shiny and free of dirt inside.
- Wipe Clean: Use a clean, damp rag to wipe away all the baking soda residue and loosened corrosion. Make sure the posts and cable ends are truly clean.
Step 5: Clean Golf Cart Battery Tray
Often, acid and dirt collect under the batteries. This area is called the battery tray. It needs cleaning too. A dirty tray can cause corrosion on the bottom of your batteries.
- Remove Batteries (If Possible): If you can, lift the batteries out of the tray. This makes cleaning easier. Be very careful! Batteries are heavy. Get help if you need it.
- Apply Baking Soda Solution: Pour your baking soda and water mix into the tray.
- Scrub the Tray: Use your stiff brush. Scrub the entire tray. Pay attention to corners and where the batteries sit.
- Rinse and Dry: Rinse the tray with clean water. Make sure all the baking soda and dirt are gone. Let the tray dry completely.
- Inspect the Tray: Look for rust or damage. If the tray is badly rusted, it might need paint or even replacement. This stops future problems.
Cleaning the golf cart battery tray helps keep the whole system clean.
Step 6: Final Rinse and Dry
After scrubbing everything, you need a final rinse.
- Rinse Batteries: Gently spray or wipe the tops of the batteries with clean water. Use a soft cloth. Do not let water get into the battery cells.
- Dry Thoroughly: Use a clean, dry rag. Wipe down all battery tops, posts, and cables. Make sure everything is dry. Moisture can cause new corrosion. A leaf blower can help speed up drying, but be careful not to blow water into cells.
This step is part of thorough golf cart battery acid cleanup.
Step 7: Reconnect Battery Cables
Now it is time to put everything back together. Refer to the photo you took earlier.
- Connect Internal Cables First: Attach the cables between the batteries first. Make sure they are tight.
- Connect Main Positive Cable: Attach the main positive cable to the positive terminal. Tighten the nut firmly.
- Connect Main Negative Cable: Attach the main negative cable last. Tighten the nut firmly.
- Check All Connections: Wiggle each cable. Make sure they are all tight. Loose connections can cause problems. They can also create heat and damage.
Step 8: Apply Anti-Corrosion Spray or Grease
To stop new corrosion from forming, add protection.
- Spray or Grease: Use a battery terminal anti-corrosion spray or grease. Spray or spread a thin layer over all the newly cleaned battery posts and cable connections. This barrier helps with preventing golf cart battery corrosion.
Your batteries are now clean and protected.
Crucial Golf Cart Battery Maintenance Tips
Cleaning is a good start. But batteries need ongoing care. Here are some golf cart battery maintenance tips to make them last even longer.
Maintain Proper Electrolyte Levels
The liquid inside your batteries is called electrolyte. It is a mix of acid and water. The level of this liquid is very important.
- Check Levels Regularly: Check your golf cart battery electrolyte levels at least once a month. More often in hot weather.
- How to Check: Open the caps on each battery cell. Look inside. The liquid should cover the plates by about 1/4 to 1/2 inch.
- Add Distilled Water Only: If levels are low, add distilled water. Do NOT add tap water. Tap water has minerals that can hurt your battery. Use a battery filler bottle for easy and safe filling.
- Do Not Overfill: Fill to the right level, but do not go too high. Overfilling can cause acid to leak out when charging.
Keep Batteries Charged
Charging your batteries correctly is very important for their health.
- Charge After Every Use: Even if you only go a short distance, plug in your golf cart. This keeps the batteries full.
- Avoid Deep Discharges: Do not let your batteries run completely flat. This damages them over time.
- Use the Right Charger: Always use a charger made for your golf cart’s battery type and voltage.
- Store Fully Charged: If you store your golf cart for a long time, make sure the batteries are fully charged. Check them often and recharge if needed.
Prevent Sulfation Golf Cart Battery
Sulfation golf cart battery is a big reason batteries die early. Sulfation happens when lead sulfate crystals build up on the battery plates. This stops the battery from holding a charge. It usually happens when batteries are left uncharged for long periods.
- Regular Charging: The best way to stop sulfation is to keep your batteries charged.
- De-sulfators: Some chargers have a de-sulfation mode. This mode sends special pulses to break up crystals.
Inspect Cables and Connections Regularly
Look at your battery cables often.
- Check for Fraying: Look for worn, cracked, or frayed cables. Replace them if they look bad.
- Ensure Tight Connections: Wiggle all connections. They should be tight. Loose connections cause heat and loss of power.
Keep the Battery Area Clean
A clean battery area helps stop corrosion.
- Wipe Down Batteries: Wipe the tops of your batteries with a damp rag every few weeks. This removes light dust and dirt.
- Clean Tray: If you see any spills or dirt in the tray, clean it right away. Use the baking soda solution.
By doing these things, your golf cart batteries will stay strong. They will power your golf cart for many years.
What if I Find Battery Acid? Golf Cart Battery Acid Cleanup
Even with care, acid spills can happen. Knowing how to handle a golf cart battery acid cleanup is important for safety.
- Put on Safety Gear: Always wear gloves and eye protection first.
- Neutralize the Acid: Pour a generous amount of baking soda directly onto the spill. You will see it fizz. Let it fizz until it stops. This means the acid is neutralized.
- Scrub (If Needed): If the spill is caked on, use a stiff brush to scrub the baking soda into the acid.
- Rinse with Water: Once fizzing stops, rinse the area with plenty of clean water.
- Dry Completely: Use rags to dry the area completely.
Always clean acid spills right away. Acid can damage metal and other parts quickly.
When to Call a Pro
Most battery cleaning and basic maintenance you can do yourself. But sometimes, you might need help.
- Damaged Batteries: If a battery is cracked, bulging, or very hot to the touch, do not try to fix it. Get a professional.
- Serious Electrical Issues: If your golf cart is not charging right, or has strange electrical problems, it might be more than dirty batteries. An expert can find the real issue.
- Too Heavy: If you cannot lift batteries safely to clean the tray, ask for help. Or get a pro to do it.
Knowing when to get help keeps you safe. It also protects your golf cart.
Frequently Asked Questions (FAQ)
Here are common questions people ask about golf cart battery cleaning and care.
Q1: How often should I clean my golf cart batteries?
A1: You should clean your golf cart batteries at least twice a year. If you use your golf cart often, or in dusty or hot places, clean them every 3-4 months. Regular checks for corrosion are also good.
Q2: Can I use regular tap water in my golf cart batteries?
A2: No, only use distilled water. Tap water has minerals and chemicals. These can build up inside the battery cells. They will harm your battery over time. Always use distilled water for topping off electrolyte levels.
Q3: What causes the white powder on my battery terminals?
A3: The white or green powder is corrosion. It is usually caused by battery acid fumes reacting with metal. It can also happen from overfilling, which lets acid leak out. This corrosion stops electricity from flowing well. Cleaning it off is very important.
Q4: Is it safe to clean batteries while they are still in the golf cart?
A4: Yes, it is safe as long as you follow all safety steps. Always disconnect the main negative cable first. Wear your safety gear. Work in a well-aired space. Make sure the golf cart is off. If you need to remove batteries to clean the tray better, do so carefully.
Q5: My batteries seem to die fast even after cleaning. What’s wrong?
A5: Cleaning helps, but it cannot fix old or damaged batteries. If they still die fast, it might be due to:
* Old batteries that have reached their end of life.
* One bad battery in the pack pulling down the others.
* Deep sulfation that cleaning alone cannot reverse.
* A faulty charger or golf cart electrical issue.
You might need to test your batteries with a voltmeter or get them checked by a professional.
Final Thoughts: Max Life for Your Battery
Cleaning your golf cart batteries is not a hard job. But it is a very important one. It helps your golf cart run smoothly. It makes your batteries last longer. This saves you money and trouble. By following this guide, you can keep your golf cart ready for many years of fun on the course or around your property. Keep them clean, keep them charged, and they will serve you well.