
Image Source: i.ytimg.com
Quick Guide: How To Check Golf Cart Battery Like A Pro
You want to know how to check your golf cart battery. This guide will show you how. Keeping your golf cart battery strong is key for a smooth ride. Regular golf cart battery testing helps you avoid problems. You can spot issues early. This saves you time and money. Learn to check your batteries like a pro. This guide covers easy checks and deeper tests.
Why Your Golf Cart Battery Needs Regular Checks
Your golf cart runs on its batteries. These batteries work hard. They give power for every trip. Over time, batteries can lose their strength. They can wear out. This is normal. But without checks, you might not know this is happening.
Regular golf cart battery testing helps you in many ways:
- Longer Battery Life: You can fix small issues before they get big. This makes your batteries last longer.
- Better Performance: A healthy battery means a strong, steady golf cart. It goes faster and farther.
- Avoid Surprises: No one wants a dead battery far from home. Checks help you prevent this.
- Save Money: Catching problems early costs less. You might only need a small fix. New batteries cost a lot.
- Stay Safe: Bad batteries can be risky. They can leak or swell. Checks help keep you safe.
Think of it like checking the air in your tires. It’s a small task. But it makes a big difference. Checking your golf cart batteries is just as important.
Getting Started: Safety First!
Working with batteries needs care. They hold strong power. They also contain acid. This acid can harm you. Always follow safety rules. This keeps you safe.
Here are key safety steps:
- Wear Eye Gear: Always put on safety glasses or goggles. This protects your eyes from acid.
- Wear Gloves: Use acid-resistant gloves. They protect your hands from acid and dirt.
- Work in a Good Spot: Choose a place with fresh air. Batteries can release gases. These gases need to go outside.
- No Sparks or Flames: Keep fire away from batteries. This includes cigarettes, lighters, and sparks. Battery gases can catch fire easily.
- Take Off Metal: Remove rings, watches, and chains. Metal can touch battery parts. This can cause a short circuit. It can burn you.
- Have Water Ready: Keep a bucket of water or baking soda nearby. This helps if acid splashes. Water washes acid away. Baking soda stops acid from working.
- Turn Off the Cart: Make sure your golf cart is off. Remove the key. This prevents it from starting by mistake.
Always put safety first. It makes working on your golf cart safe and easy.
Essential Tools for Battery Checks
You need the right tools for a good battery check. Each tool helps you learn something new about your batteries. Here is what you will need:
- Multimeter: This tool checks voltage. It tells you how much power each battery has. It also checks the total power of all batteries together.
- Battery Hydrometer: This tool checks specific gravity. It tells you how strong the acid mix is inside each battery cell. This is a very good sign of battery health.
- Battery Load Tester: This tool puts a heavy drain on the battery. It shows how the battery works under stress. It helps find weak batteries.
- Distilled Water: You only add distilled water to batteries. Tap water has minerals. These minerals can hurt batteries.
- Battery Terminal Cleaner/Wire Brush: These tools clean battery posts and cables. Dirty parts can stop power flow.
- Wrench: You might need this to remove battery cables. Make sure it is the right size.
Having these tools ready makes your battery check simple. You will get true readings.
Method 1: Battery Voltage Check Golf Cart (The Easy Way)
A voltage check is the simplest test. It tells you the charge level of your batteries. It uses a multimeter. This check is quick. It helps you see if your batteries are full. It also shows if they are losing power.
Deciphering Golf Cart Battery Voltage
Voltage is like the pressure of water in a pipe. Higher voltage means more power. Each golf cart battery has a set voltage. Common types are 6-volt, 8-volt, or 12-volt batteries. Your golf cart has many batteries linked together. They make a total voltage. This total can be 36 volts, 48 volts, or 72 volts.
Here is what full voltages look like for common golf cart systems:
| Battery Type (Each) | Total System (Example) | Fully Charged Voltage (Each) | Fully Charged Voltage (Total) |
|---|---|---|---|
| 6-Volt | 36-Volt (6 x 6V) | 6.3 – 6.4 Volts | 37.8 – 38.4 Volts |
| 8-Volt | 48-Volt (6 x 8V) | 8.4 – 8.5 Volts | 50.4 – 51.0 Volts |
| 12-Volt | 48-Volt (4 x 12V) | 12.6 – 12.7 Volts | 50.4 – 50.8 Volts |
Note: These are ideal readings for fully charged batteries, rested for a few hours after charging.
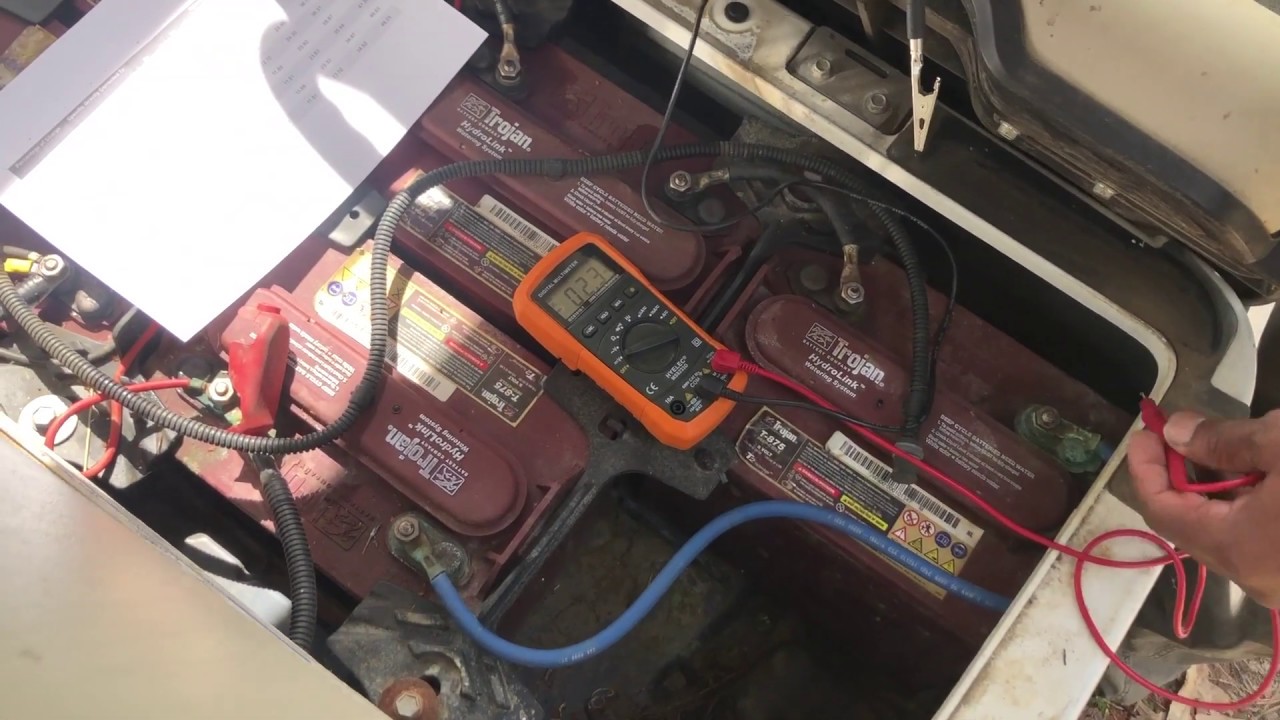
Golf Cart Battery Multimeter Usage
Using a multimeter is easy. It gives you a clear number for each battery. This number tells you its charge.
Follow these steps for golf cart battery multimeter usage:
- Safety First: Put on your safety glasses and gloves.
- Charge Batteries Fully: Make sure your batteries are fully charged. Let them rest for 8-12 hours. This gives you a true reading. The voltage settles.
- Set the Multimeter:
- Turn the dial to DC Volts (VDC or a V with a straight line above it).
- Choose a range higher than your battery’s voltage. For a 6-volt battery, pick 20V DC. For a 12-volt battery, pick 20V DC or 200V DC. If your multimeter has an “auto-range” feature, you can use that.
- Check Each Battery:
- Find the positive (+) and negative (-) terminals on one battery.
- Touch the red probe to the positive (+) terminal.
- Touch the black probe to the negative (-) terminal.
- Read the number on the multimeter screen. Write it down.
- Move to the next battery. Check every single one.
- Check Total Pack Voltage:
- For the whole battery pack, touch the red probe to the positive terminal of the first battery.
- Touch the black probe to the negative terminal of the last battery in the series.
- Read the total voltage. Write it down.
Interpreting the Readings:
- All Readings High and Even: This is good. Your batteries are healthy and charged.
- One Battery Is Much Lower: This battery might be weak or failing. A difference of 0.2 volts or more from others can mean trouble.
- All Readings Low but Even: Your batteries might just need charging. Or, they might be getting old.
- Total Pack Voltage Low: This shows the whole system is not holding a charge well.
The voltage check is a good first step. But it does not tell the whole story. You need more tests for a full picture.
Method 2: Golf Cart Battery Specific Gravity (The Deeper Dive)
Specific gravity is a powerful way to check battery health. It tells you about the acid mix inside each battery cell. A battery hydrometer is the tool for this. This test is more detailed than a voltage check. It can show problems a voltage check might miss.
What is Specific Gravity?
Inside your golf cart battery cells, there is a mix of sulfuric acid and water. This is called electrolyte. When a battery is full, the acid is strong. When it loses charge, the acid gets weaker. Water forms.
Specific gravity measures how dense this electrolyte is. A higher number means more acid. This shows a fuller charge. A lower number means less acid. This shows a lower charge or a weak cell. The hydrometer floats higher in strong acid. It sinks lower in weak acid. This float tells you the specific gravity.
How to Use Golf Cart Battery Hydrometer
Using a hydrometer needs care. You are working with battery acid.
Follow these steps for how to use golf cart battery hydrometer:
- Safety First (Again!): Always wear safety glasses and gloves. Work in a good air spot.
- Charge and Rest: Fully charge your batteries. Let them rest for a few hours. A cold battery or one just charged will give false readings.
- Open Cell Caps: Find the small caps on top of each battery. Lift or twist them off. You will see the battery cells inside. Most 6V batteries have 3 cells. 8V and 12V batteries have 4 or 6 cells. You must check every single cell.
- Insert Hydrometer: Gently push the hydrometer’s rubber tip into a cell. Make sure the tip goes below the liquid surface. Do not touch the plates inside.
- Draw Electrolyte: Squeeze the rubber bulb. Then slowly let it go. This pulls electrolyte into the hydrometer. Pull enough so the float inside the hydrometer lifts freely. It should not touch the top or bottom.
- Read the Number: Look at the hydrometer at eye level. Read the number where the electrolyte level meets the float. Write this number down. Do this for each cell in every battery.
- Return Electrolyte: Gently squeeze the bulb to put the electrolyte back into the same cell. Do not mix it between cells.
- Clean Hydrometer: After checking all cells, clean your hydrometer. Rinse it with clean water. Store it safely.
- Close Caps: Put all cell caps back on. Make sure they are tight.
Interpreting Specific Gravity Readings
Specific gravity readings are very telling. They show the exact health of each cell.
Here is a guide to what readings mean for a battery at 80°F (27°C):
| State of Charge | Specific Gravity Reading |
|---|---|
| Fully Charged | 1.265 – 1.280 |
| 75% Charged | 1.225 |
| 50% Charged | 1.190 |
| 25% Charged | 1.155 |
| Discharged | 1.120 or lower |
What the Readings Tell You:
- All Readings High and Close: This is great. Your batteries are fully charged and healthy. The numbers should be within 0.010 of each other across all cells.
- One Cell Is Much Lower: This is a big red flag. A cell with a reading 0.050 or more lower than others is likely bad. It is a “dead cell.” This cell brings down the whole battery. The battery will not hold a full charge. This often means the whole battery needs to be replaced.
- All Readings Low but Even: Your batteries are low on charge. They need to be charged fully. Check them again after charging.
- Wide Differences Between Cells: If readings vary a lot, it means some cells are weaker. This can point to battery issues. It might mean the battery is aging.
The specific gravity test is vital. It shows problems that voltage checks might miss. It helps with a full golf cart battery health assessment.
Method 3: Golf Cart Battery Load Test (The Ultimate Check)
A load test is the true test of a battery. It puts a heavy drain on the battery. This test shows how the battery works under real use. It tells you if the battery can deliver power when needed. This is a key part of golf cart battery health assessment.
Why a Load Test Matters
Imagine a battery that shows full voltage. It looks fine on a meter. But what happens when you press the gas pedal? Does it suddenly die? This can happen if the battery cannot hold voltage under a heavy load. A load test checks for this. It finds batteries that are weak. They might hold a charge. But they cannot give steady power. This test helps find batteries that are ready to fail.
Performing a Golf Cart Battery Load Test
You will need a specific tool for this: a battery load tester. Some can test individual batteries. Others test the whole pack. Always follow the tester’s instructions.
Here are the general steps for a golf cart battery load test:
- Safety First: Put on your safety gear.
- Charge and Rest: Fully charge all batteries. Let them rest for at least 8 hours. This is important for accurate results.
- Prepare the Load Tester: Make sure the load tester is set for your battery’s voltage (6V, 8V, 12V).
- Connect the Tester:
- Connect the load tester’s positive clamp (red) to the battery’s positive (+) terminal.
- Connect the load tester’s negative clamp (black) to the battery’s negative (-) terminal.
- Apply the Load:
- Press the load test button on the tester. Do this for about 10-15 seconds. Do not hold it longer. This can damage the battery.
- Watch the voltage meter on the tester during this time.
- Read the Voltage: After 10-15 seconds, release the button. Note the lowest voltage reading during the test.
- Compare Results:
- For a 6-volt battery, the voltage should not drop below 4.8 volts.
- For an 8-volt battery, it should not drop below 6.4 volts.
- For a 12-volt battery, it should not drop below 9.6 volts.
- Test All Batteries: Repeat this process for each battery in your golf cart.
Interpreting Load Test Results:
- Voltage Holds Steady: This is good. The battery can handle the power demand.
- Voltage Drops Too Low: This battery is weak. It cannot hold power under a load. Even if its voltage looks fine when idle, it will fail when used. This battery likely needs replacing.
- Voltage Drops Fast: If the voltage drops very quickly, it is a sign of a bad battery.
A load test gives you a clear picture. It shows which batteries are truly ready for action. It helps find hidden weaknesses.
Golf Cart Battery Health Assessment: Putting It All Together
You have done all the tests. Now, it is time to look at all the numbers. A full golf cart battery health assessment uses all the info.
- Compare Voltage Readings: Are all batteries close in voltage? A difference of 0.2 volts or more between batteries after a full charge is a red flag.
- Examine Specific Gravity: Are all cells within 0.010 of each other? Is any cell 0.050 or more lower than others? This points to a bad cell or battery.
- Review Load Test Results: Did any battery drop too low during the load test? This battery is weak.
- Look for Consistency: Good batteries show similar results across all tests. They have high, even voltage. Their specific gravity is high and even. They hold voltage well under load.
- Spot the Weak Link: Often, one bad battery can make the whole pack seem weak. Finding that one battery saves you money. You might not need to buy a whole new set.
Use a simple table to track your results. This helps you compare:
| Battery # | Voltage (V) | Cell 1 SG | Cell 2 SG | Cell 3 SG | Load Test (V) | Notes |
|---|---|---|---|---|---|---|
| 1 | 6.35 | 1.270 | 1.265 | 1.275 | 5.0 | Good |
| 2 | 6.30 | 1.260 | 1.270 | 1.265 | 4.9 | Good |
| 3 | 6.10 | 1.250 | 1.200 | 1.240 | 4.5 | Cell 2 low, weak! |
| 4 | 6.32 | 1.270 | 1.270 | 1.268 | 5.1 | Good |
| 5 | 6.28 | 1.265 | 1.260 | 1.270 | 4.8 | Good |
| 6 | 6.33 | 1.272 | 1.270 | 1.269 | 5.0 | Good |
In this example, Battery #3 stands out. Its voltage is lower. Cell 2 specific gravity is much lower. And it dropped too much in the load test. This battery needs attention or replacement.
Golf Cart Battery Troubleshooting Common Issues
Your tests might show problems. Do not worry. Many issues can be fixed. This is part of golf cart battery troubleshooting.
- Low Voltage (All Batteries):
- Reason: Batteries are not fully charged. Charger issue.
- Fix: Charge batteries fully. Check your charger. Make sure it is working.
- One Battery Has Low Voltage:
- Reason: That single battery is weak. It might have a bad cell.
- Fix: Check specific gravity for that battery. If one cell is low, the battery needs to be replaced. You might try “equalizing” it if your charger has this mode. This is a long, slow charge to try to balance cells. But often, a bad cell is permanent.
- Inconsistent Specific Gravity Readings:
- Reason: Some cells are weaker. Or, water levels are low.
- Fix: Check water levels. Add distilled water if needed. Re-charge and re-test. If readings stay uneven, the battery is failing.
- Batteries Die Fast (Even if Voltage Looks Good When Idle):
- Reason: Batteries cannot hold up under a load. They are weak.
- Fix: Do a load test. This will confirm weak batteries. These batteries need replacing.
- Corrosion on Terminals:
- Reason: Acid escaping. Lack of cleaning.
- Fix: Clean terminals with a wire brush and baking soda/water mix. Rinse well. Dry. Put a battery terminal protector on.
- Low Water Levels:
- Reason: Evaporation during charging.
- Fix: Add distilled water. Fill to the right level (about 1/2 inch above plates). Do this after charging. If levels drop very fast, you might be overcharging.
Remember, a good golf cart battery maintenance guide is your best tool. It helps prevent problems.
Golf Cart Battery Maintenance Guide: Keeping Your Batteries Strong
Good care makes batteries last. Follow these steps. This is your golf cart battery maintenance guide.
- Charge Often: Charge your batteries after every use. Even short rides. Do not let them sit for long with a low charge.
- Charge Fully: Always let the charger finish its cycle. This makes sure batteries get a full charge. Stopping too soon hurts battery life.
- Check Water Levels: Do this once a month. Use only distilled water.
- Check after charging.
- Add water if plates are exposed.
- Do not overfill. Fill to about 1/2 inch above the plates.
- Keep Terminals Clean: Clean battery terminals often. Use a wire brush. Make a mix of baking soda and water. Scrub away any white or blue stuff. Rinse with clean water. Dry well. Put on a battery terminal spray or grease. Clean terminals help power flow well.
- Tighten Connections: Check battery cable connections. Make sure they are tight. Loose wires cause heat. They can hurt your batteries.
- Do Not Over-Discharge: Do not run your golf cart until it stops. This hurts the batteries deeply. If the cart feels slow, charge it.
- Store Properly: If you store your cart for a long time:
- Charge batteries fully.
- Check water levels.
- Disconnect the main battery cable (usually the negative one). This stops small power drains.
- Store in a cool, dry place.
- Check charge every month or so. Give a quick charge if needed.
Good habits mean healthy batteries. They will perform better. They will last longer.
Recognizing Golf Cart Battery Replacement Signs
Even with the best care, batteries wear out. They do not last forever. Knowing the golf cart battery replacement signs helps you plan. It stops you from being stuck.
Here are key signs it is time for new batteries:
- Shortened Run Time: Your golf cart used to go for miles. Now, it only goes a short distance before slowing down. This is a clear sign.
- Slow Acceleration/Weak Power: The cart feels sluggish. It struggles on hills. It does not have its usual zip. This means the batteries cannot give enough power.
- Batteries Do Not Hold a Charge: You charge them fully. But they lose power fast. They drop voltage quickly after charging.
- Boiling or Strong Acid Smell While Charging: This can mean a bad cell. It can also mean the charger is overworking a weak battery. This is a safety concern.
- Physical Damage:
- Swelling: Battery cases look bloated. This means gases are building up inside. This is very dangerous.
- Cracks/Leaking: You see acid leaking from the case. This is a major hazard.
- Corrosion That Won’t Clean: Extreme corrosion that keeps coming back fast.
- Constant Low Voltage or Specific Gravity: Even after full charging, your multimeter and hydrometer show consistently low readings. Especially if one or more cells are very low.
- Age of Batteries: Most golf cart batteries last 4-7 years. If yours are older, they are likely at the end of their life. Even if they seem okay, their performance will drop soon.
- One Bad Battery in the Pack: If you find one battery that is clearly bad (low specific gravity in one cell, fails load test), it is often best to replace the whole set. A new battery with old ones can cause the new one to fail faster.
If you see these signs, start planning for new batteries. Replacing them keeps your golf cart running great.
Frequently Asked Questions (FAQ)
Q: How often should I check my golf cart batteries?
A: You should do a quick check (voltage, water levels, clean terminals) at least once a month. A more detailed check (specific gravity, load test) should be done every 3-6 months. Do this especially before long periods of storage or heavy use.
Q: Can I mix old and new golf cart batteries?
A: No, you should not mix old and new golf cart batteries. New batteries have more power. Old batteries are weaker. The new batteries will work harder. This will make them wear out faster. It can also hurt the old batteries. Always replace all batteries in a pack at the same time.
Q: What if one cell reads very low on the hydrometer?
A: If one cell reads much lower (0.050 or more difference) than the others, it means that cell is dead or dying. This is often called a “dead cell.” This battery will not hold a full charge. It will bring down the performance of your entire battery pack. You will likely need to replace that entire battery.
Q: How long do golf cart batteries typically last?
A: The life of golf cart batteries depends on how you use and care for them. With good care, golf cart batteries can last 4-7 years. Some may last longer. Bad care can make them fail in 2-3 years.
Q: Is it safe to add tap water to my golf cart batteries?
A: No, it is not safe to add tap water. Tap water has minerals and chemicals. These can build up inside your battery cells. They can harm the plates and stop the battery from working right. Always use only distilled water. It is pure and will not hurt your batteries.