
Expert Guide: How Do You Cut A Graphite Golf Shaft Safely?
You can cut a graphite golf shaft safely by using the right tools and following strict safety steps. The best way involves a high-speed rotary tool equipped with a special abrasive cutoff wheel designed for carbon fiber. Always wear safety glasses and a dust mask. Secure the shaft tightly and make a slow, steady cut to prevent splintering. This guide will walk you through each step. It will help you get a clean, safe cut every time.
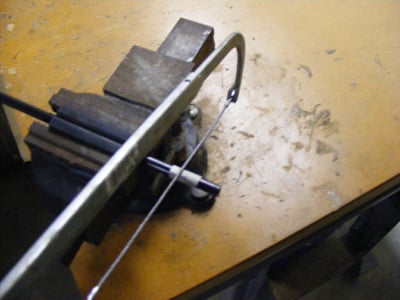
Image Source: www.hirekogolf.com
Preparing for a Perfect Cut
Cutting a golf shaft might seem simple. But with graphite, it needs care. Graphite shafts are strong and light. They are made from layers of carbon fiber. Cutting them wrong can cause damage. It can also be unsafe. A bad cut can ruin the shaft. It can also hurt you. So, always take your time. Follow the steps carefully.
Why Cut a Graphite Shaft?
People cut graphite shafts for many reasons. Here are the main ones:
- Club Fitting: Golfers often need clubs that fit their height and swing. Cutting the shaft changes the club’s length. This helps the golfer play better.
- Weight Changes: A shorter shaft makes a club lighter. This can change how the club feels. It can also change how fast you swing it.
- Swing Weight Adjustments: Every club has a “swing weight.” This is how heavy it feels when you swing it. Cutting the shaft changes this weight.
- Damage Repair: Sometimes, a shaft gets a small crack or chip near the tip. You might cut off the bad part. Then you can put the shaft back into the clubhead. This is a form of carbon fiber golf repair.
- Custom Builds: Club builders make clubs from scratch. They cut shafts to exact lengths for new clubs. This is part of many club building techniques.
Essential Tools for Cutting Graphite
Having the right tools is key. Do not try to cut graphite with hand saws or hacksaws. These tools will fray the carbon fibers. They will make a messy, unsafe cut. You need specific graphite shaft cutting tools.
Here is a list of what you will need:
- Rotary Tool: A high-speed rotary tool golf clubs is ideal. Brands like Dremel are popular. It must spin very fast. This helps make a clean cut.
- Abrasive Cutoff Wheel: This is the most important part. You need a thin, fiberglass-reinforced abrasive cutoff wheel. It must be made for cutting hard materials. Do not use metal cutting wheels. They can damage graphite.
- Shaft Clamp or Vice: You need something to hold the shaft still. A rubber-jawed vice or a special shaft clamp works best. It prevents the shaft from moving. It also stops it from getting crushed.
- Measuring Tape or Ruler: For golf shaft measurement. An accurate ruler is vital. You must know exactly where to cut.
- Fine-Tip Marker: For marking the cut line clearly.
- Masking Tape: To wrap around the cut area. This helps prevent shaft splintering.
- Dust Mask: Graphite dust is harmful if you breathe it in.
- Safety Glasses: To protect your eyes from flying debris.
- Work Gloves: To protect your hands.
- Fine-Grit Sandpaper or Deburring Tool: For deburring graphite material after the cut.
- Clean Cloth: To wipe off dust.
You can find most of these items at hardware stores. Many golf club building supplies shops also sell them.
Safety First: Your Health Matters
Cutting graphite shafts makes fine dust. This dust can be bad for your lungs. It can also irritate your skin and eyes. Always put safety first.
- Eye Protection: Wear safety glasses or goggles. They will stop small bits from hitting your eyes.
- Respiratory Protection: Use a good quality dust mask or respirator. This stops you from breathing in carbon dust. Do not skip this step.
- Hand Protection: Wear work gloves. They protect your hands from cuts and dust.
- Work Area: Work in a well-aired space. If you can, work outside. This helps dust blow away.
- Cleanliness: Clean up all dust right away. Use a damp cloth or a vacuum with a HEPA filter. Do not sweep dust into the air.
Remember, safety gear is not optional. It is a must.
Getting Ready: Precise Golf Shaft Measurement
Accuracy is very important. Even a small mistake in length can change how a club plays.
- Measure the Current Club: If you are shortening an existing club, measure its total length first. Place the club on a flat surface. Use a ruler. Measure from the ground to the very top of the grip. Make a note of this length.
- Determine New Length: Decide how much shorter you want the club to be. For example, if you want it 1 inch shorter, subtract 1 inch from the current length.
- Mark the Cut Point: Now, you need to mark where to cut the shaft.
- Tip Trimming: This is common for new, uncut shafts. Many shafts come in standard lengths. You trim the tip end to adjust the shaft’s stiffness. The shaft maker provides a “shaft trimming guide.” This guide tells you how much to cut from the tip for different flexes. Always check the shaft maker’s instructions.
- Butt Trimming: This is more common when shortening an existing club. You cut from the grip end (butt end) of the shaft. This affects the club’s overall length and swing weight. It does not change the shaft’s stiffness.
- Use Masking Tape: Wrap masking tape around the shaft where you plan to cut. Make sure the tape covers about an inch on both sides of your mark. This tape will help prevent shaft splintering during the cut. It keeps the fibers together.
- Mark the Line: Use a fine-tip marker. Draw a clear line around the shaft on the tape. This is your cutting line. Double-check your measurement. Measure twice, cut once!
Securing the Shaft for Cutting
Holding the shaft correctly is vital. A wobbly shaft means a bad cut. It can also be dangerous.
- Use a Shaft Clamp or Vice: The best way to hold the shaft is with a special shaft clamp. This clamp has soft rubber jaws. They grip the shaft firmly without crushing it. If you use a regular metal vice, add rubber pads or wood blocks to the jaws. This protects the shaft.
- Position the Shaft: Place the shaft in the clamp. The part you are cutting off should hang freely. Make sure the marked line is just outside the clamp. You want a clear path for your cutting wheel.
- Tighten Firmly: Tighten the clamp or vice firmly. The shaft must not move at all. But do not overtighten it. You can crush the shaft if you do. Graphite is strong, but it can crack under too much pressure.
The Cutting Process: A Step-by-Step Guide
With safety gear on and the shaft secure, you are ready to cut. Take your time. Do not rush.
Choosing and Using Your Graphite Shaft Cutting Tool
The most common and effective tool for graphite is a high-speed rotary tool.
- Attach the Abrasive Cutoff Wheel: Put the abrasive cutoff wheel onto your rotary tool. Make sure it is secure. It should be tight and centered. A loose wheel is very dangerous.
- Check Wheel Speed: Most rotary tools have speed settings. Set the tool to a high speed. A fast-spinning wheel cuts cleaner. It reduces friction and heat. This helps prevent shaft splintering.
- Hold the Tool Firmly: Hold the rotary tool with both hands if possible. Keep it steady. Your hands should be away from the cutting wheel.
The Cutting Technique: Slow and Steady Wins the Race
This is where many club building techniques come into play. A good cut makes a clean edge. It helps with future club assembly.
- Start the Tool: Turn on your rotary tool. Let the wheel get to full speed before touching the shaft.
- Gentle Touch: Slowly bring the spinning abrasive cutoff wheel to the marked line on the shaft. Do not push hard. Let the tool do the work.
- Rotate the Shaft: Instead of pushing the wheel all the way through, rotate the shaft slowly as you cut. Or, if the shaft is fixed, slowly move the tool around the shaft. You want to cut around the shaft, not straight through it. This makes a cleaner cut. It also helps prevent the wheel from getting stuck.
- Steady Pressure: Apply very light, even pressure. Too much pressure can cause the shaft to fray. It can also make the wheel bind or break.
- Watch for Dust: You will see a lot of fine, black dust. This is normal. Make sure your dust mask is on.
- Complete the Cut: Keep rotating and cutting slowly. The cut will go deeper and deeper. The shaft will eventually separate cleanly. Do not try to snap the shaft at the end. Cut all the way through.
Tips to Prevent Shaft Splintering
Splintering is when the carbon fibers at the cut edge break apart. This makes a rough, uneven edge. It also weakens the shaft.
- Masking Tape: As mentioned, the masking tape around the cut area is your first defense. It holds the fibers together.
- Sharp, New Wheel: Use a new, sharp abrasive cutoff wheel. A dull wheel will tear at the fibers.
- High Speed: Set your rotary tool golf clubs to a high RPM (revolutions per minute). Faster speeds cut cleaner.
- Light Pressure: Do not press hard. Let the wheel cut at its own pace.
- Rotate the Shaft: Cutting around the shaft, rather than plunging through, is key. This puts less stress on one spot.
- Cool Down: If you are making many cuts, the wheel or shaft might get hot. Take breaks to let them cool.
Post-Cut Finishing: Making it Smooth
After the cut, the shaft edge will be rough. It will have sharp edges. You need to smooth it out. This is called deburring graphite material.
Deburring Graphite Material
Deburring means removing the rough edges or burrs left after cutting.
- Inspect the Cut: Look closely at the cut edge. You will see small, sharp bits of carbon fiber. These are the burrs.
- Use Fine-Grit Sandpaper: Take a piece of fine-grit sandpaper (around 220-grit or higher). Gently sand the edge of the shaft. Sand in a circular motion. Aim to smooth out any rough spots. Do not sand too much. You only want to remove the burrs.
- Deburring Tool (Optional): Some club builders use a special deburring tool. These tools quickly remove burrs from edges. If you do not have one, sandpaper works fine.
- Check for Smoothness: Run your finger gently over the cut edge. It should feel smooth. There should be no sharp points or loose fibers. A smooth edge helps when you install the grip or ferrule. It also makes the shaft safer to handle.
Cleaning the Shaft
After cutting and deburring, there will be fine carbon dust.
- Wipe with a Damp Cloth: Use a slightly damp cloth to wipe down the cut end of the shaft. This removes any remaining dust.
- Let it Dry: Let the shaft end air dry completely before doing anything else.
Advanced Club Building Techniques and Tips
Beyond the basic cut, some other points can help you achieve professional results.
Tip Trimming vs. Butt Trimming
This is a key concept in club fitting.
- Tip Trimming: As mentioned, this changes the shaft’s stiffness. A shaft has a flexible “tip” section. Cutting from here makes the shaft stiffer. Most new shafts come untrimmed at the tip. You use a shaft trimming guide from the manufacturer to decide how much to cut. This guide is critical for getting the right shaft flex (e.g., Regular, Stiff, X-Stiff). This is usually done before the shaft is put into the clubhead.
- Butt Trimming: This is simply shortening the shaft from the grip end. It does not change the shaft’s flex. It mostly affects the club’s length and swing weight. This is what you do when you want to make an assembled club shorter.
Table: Tip Trimming vs. Butt Trimming
| Feature | Tip Trimming | Butt Trimming |
|---|---|---|
| Location of Cut | Head end (tip) of the shaft | Grip end (butt) of the shaft |
| Effect on Flex | Increases shaft stiffness (makes it firmer) | No change to shaft stiffness |
| Effect on Length | Shortens the shaft (after installation) | Shortens the shaft |
| Effect on Swing Wt. | Minor increase (due to stiffness change) | Reduces swing weight (can add weight to head) |
| Common Use | Adjusting shaft flex for new builds/replacements | Shortening existing clubs for fitting |
| Guidance | Requires manufacturer’s shaft trimming guide | Based on desired finished club length |
Weighing the Club: Swing Weight and Static Weight
Cutting a shaft changes the club’s weight.
- Static Weight: This is the total weight of the club. A shorter shaft means less material, so the static weight goes down.
- Swing Weight: This is how heavy the club feels when you swing it. It’s a balance measurement. Shortening a club from the butt end makes the swing weight lighter. If you cut 1 inch off the butt, the swing weight usually drops by about 3-6 swing weight points. Many golfers want a specific swing weight. You can add weight to the clubhead (e.g., lead tape) to bring the swing weight back up after cutting.
Understanding these changes is a key part of advanced club building techniques.
Carbon Fiber Golf Repair Considerations
Sometimes, a shaft might get a small crack or chip near the tip. If the damage is small, you might be able to cut off the damaged part. This is a form of carbon fiber golf repair. However, this is only for minor damage. If the crack is large, or in the middle of the shaft, you must replace the shaft. Do not try to repair a majorly damaged shaft. It can be very dangerous if it breaks during a swing.
Getting Golf Club Building Supplies
You can buy graphite shaft cutting tools and other supplies from:
- Online Golf Retailers: Many sites specialize in golf club components.
- Specialty Club Building Stores: Some bigger cities have stores just for building and repairing golf clubs.
- Hardware Stores: For basic tools like rotary tools, safety gear, and sandpaper.
Always buy high-quality abrasive cutoff wheels. Cheap wheels can break easily. This is a safety risk.
Common Mistakes to Avoid
- Rushing the Cut: This leads to poor cuts, splintering, and potential injury.
- Using the Wrong Tools: Hacksaws, pipe cutters, or dull blades will ruin the shaft.
- Not Wearing Safety Gear: Breathing carbon dust or getting debris in your eyes is serious.
- Overtightening the Clamp: This can crush the shaft.
- Cutting Without Masking Tape: Increases the risk of splintering.
- Ignoring Shaft Trimming Guides: If tip trimming, you need to follow the manufacturer’s guide for the right flex.
- Forgetting to Deburr: Leaves a rough, unsafe edge.
Environmental Considerations
When cleaning up, remember that carbon dust is a fine particle. It can be an irritant.
* Vacuum, don’t sweep: Use a shop vacuum with a good filter. Do not use a broom. Sweeping kicks dust into the air.
* Dispose of waste properly: Place the cut-off shaft pieces and any dusty rags in a sealed bag. Dispose of them as general waste.
By following these steps, you will be able to cut graphite golf shafts safely and effectively. This will help you get the right fit for your clubs. It will also help you save money on professional club fitting services. With practice, you will become very good at it.
Frequently Asked Questions (FAQ)
Q1: Can I use a hacksaw to cut a graphite golf shaft?
A1: No, you should never use a hacksaw. A hacksaw will fray the carbon fibers. This creates a very rough edge. It can also weaken the shaft. This makes the shaft unsafe. Always use a high-speed rotary tool with an abrasive cutoff wheel.
Q2: What is the best way to prevent shaft splintering?
A2: To prevent shaft splintering, wrap masking tape tightly around the cut area. Use a sharp, new abrasive cutoff wheel. Set your rotary tool to a high speed. Apply very light pressure. Rotate the shaft slowly as you cut.
Q3: Does cutting a graphite shaft change its stiffness?
A3: It depends on where you cut it. If you cut from the tip end (tip trimming), it will make the shaft stiffer. If you cut from the butt end (butt trimming, where the grip goes), it does not change the shaft’s stiffness. Butt trimming only changes the club’s length and swing weight.
Q4: Do I need special safety gear to cut graphite?
A4: Yes, absolutely. You must wear safety glasses to protect your eyes. A dust mask or respirator is essential to prevent breathing in carbon dust. Gloves are also good to protect your hands. Work in a well-aired area.
Q5: How do I know how much to cut from the shaft?
A5: For shortening an existing club, measure the current length. Decide how much shorter you want it. Mark that length from the butt end. For new shafts, check the shaft manufacturer’s shaft trimming guide. This guide tells you how much to cut from the tip for specific flexes. Golf shaft measurement must be very precise.
Q6: What is deburring graphite material? Why is it important?
A6: Deburring is the process of removing the sharp, rough edges left after cutting. It is important for safety. A smooth edge prevents cuts. It also makes it easier to install the grip or ferrule. You can use fine-grit sandpaper or a special deburring tool.
Q7: Where can I buy a graphite shaft cutting tool and other supplies?
A7: You can find graphite shaft cutting tools, abrasive cutoff wheels, and other golf club building supplies at online golf retailers, specialty club building stores, and even some well-stocked hardware stores. Always buy quality tools and parts.
Q8: Can I cut a graphite shaft at home if I’m not a club builder?
A8: Yes, you can. But you must follow all safety guidelines. You also need to have the right tools. If you are unsure, it is always best to let a professional club fitter or builder do the work. Your safety and the club’s performance are most important.