
Protect Your Ride: How To Winterize An Electric Golf Cart
Do you need to winterize an electric golf cart? Yes, you do. Winterizing your electric golf cart is very important. It helps keep your cart safe from cold weather damage. It makes sure your cart works well when spring comes. This guide will show you how to prepare your electric golf cart for cold weather. It covers everything from batteries to tires. Follow these steps to protect your ride.
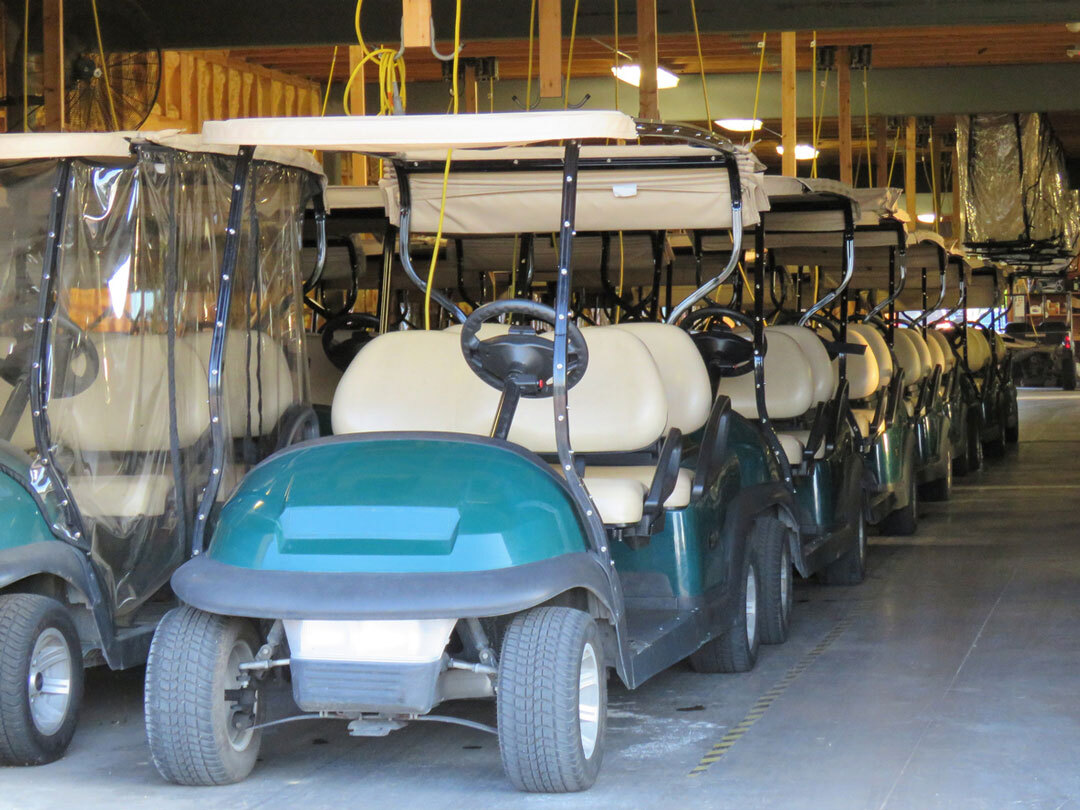
Image Source: ceb8596f236225acd007-8e95328c173a04ed694af83ee4e24c15.ssl.cf5.rackcdn.com
Why Winterize Your Electric Golf Cart?
Cold weather can hurt your golf cart. Water can freeze and expand. This can crack parts. Batteries lose power faster in the cold. Storing your cart wrong can lead to costly repairs. Winterizing stops these problems. It saves you money. It keeps your cart running longer. Think of it as a rest period for your cart. A good rest means a strong start next season.
Guarding Your Investment
Your electric golf cart is an investment. It brings fun and ease to your life. Leaving it out in the cold without care is risky. It’s like leaving a car outside in a snowstorm. Bad things can happen. Rust can form on metal parts. Wires can fray or crack. Plastic and rubber parts can become brittle. Parts can break completely. Winterizing is about prevention. It stops small problems from becoming big ones. This guards your cart from damage. It protects your money too.
Avoiding Costly Repairs
Many people skip winterizing. They think it’s not needed. But later, they face big repair bills. A frozen battery can be ruined forever. A cracked tire needs replacing. A rusty frame might need welding. These costs add up fast. A little work now saves a lot of money later. It also saves you trouble. You want to enjoy your cart, not fix it. Winterizing is a smart choice for any golf cart owner. It’s a simple way to avoid big headaches.
Keeping Your Cart Ready
A well-winterized cart is ready to go. When warm weather returns, you just need to do a few checks. Then, you can drive it right away. An uncared-for cart needs much more work. It might not even start. You want to hit the course. You don’t want to fix your cart. Winterizing ensures your cart is always ready for fun. It means less waiting. It means more playing.
Starting Off Right: Clean Your Cart
Before putting your cart away, clean it well. This is a key step. Dirt and grime can hold moisture. Moisture leads to rust. It can also hide damage. A clean cart is a happy cart. It also makes it easier to spot problems. This cleaning golf cart before storage step is very important.
Giving Your Cart a Good Wash
Wash your cart from top to bottom. Use mild soap and water. A soft brush or sponge works best. Rinse it completely. Make sure no soap is left behind. Pay attention to the underside of the cart. Dirt and grass often hide there. Clean the wheels and tires too. Remove any mud or debris.
- Use a hose with gentle water pressure.
- Wipe down all surfaces carefully.
- Get into every nook and cranny.
- Rinse thoroughly to remove all soap.
- Let your cart dry fully before moving on. You can use a towel or let it air dry in the sun.
Looking for Trouble Spots
While cleaning, check for damage. Look for cracks in the body. Check for loose wires. See if any parts are worn. Note down anything you find. You can fix small issues now. This stops them from growing worse during storage. This check helps prepare your electric golf cart for cold weather.
- Check all lights to see if they work.
- Look at mirrors for cracks or looseness.
- Feel for loose seats or seat covers.
- Inspect the cart’s frame for any signs of rust.
- Look at the suspension parts.
- Check brake lines for any leaks.
The Heart of Your Cart: Golf Cart Battery Winterization
The battery is the most important part to care for. It needs special attention in winter. Cold can severely damage batteries. Proper golf cart battery winterization is a must. Neglecting batteries can lead to their complete ruin.
Charging Your Batteries Fully
Before storing, charge your batteries to 100%. A full charge helps them last longer. It prevents them from losing power over time. Use your cart’s regular charger. Let it run until it stops completely. The charger light will usually turn green.
- Plug in the charger to a working outlet.
- Connect it to your golf cart’s charge port.
- Wait for the “charged” light to come on.
- Do this even if you just used the cart. A full charge is key.
Disconnecting Your Batteries
Once charged, disconnect the main battery cables. Always start with the negative cable first. It is usually black. Then, disconnect the positive cable. It is usually red. This stops any power drain from the cart’s systems. Even small drains can hurt batteries over time. This is part of long-term golf cart battery care.
- Use a wrench of the correct size.
- Remove the negative (-) cable first. It is usually black.
- Remove the positive (+) cable second. It is usually red.
- Make sure battery terminals are clean after removal.
- Keep the cables away from the terminals. You can tape them up.
Cleaning Battery Terminals
Corrosion can form on battery terminals. It looks like a white or blue powder. This hurts battery power flow. It makes it hard for batteries to charge. Clean terminals with a wire brush. You can use a mix of baking soda and water. Make a paste. Apply it to the corrosion. Scrub gently. Rinse with clean water. Dry them completely with a rag. This step is key for storing golf cart batteries in winter.
- Wear gloves and eye protection for safety.
- Mix one tablespoon of baking soda with one cup of water to make a paste.
- Apply the paste to the corroded areas.
- Scrub terminals with a wire brush or an old toothbrush.
- Rinse with clean water to wash off the paste and corrosion.
- Dry thoroughly with a clean rag. Any moisture can cause new corrosion.
Checking Water Levels in Batteries
If you have lead-acid batteries, check their water levels. This is for batteries that need water added. These are usually the ones with removable caps. Lift the caps on each cell carefully. The water should cover the plates inside. If not, add distilled water. Do not use tap water. Tap water has minerals that can hurt batteries. Make sure plates are covered. Do not overfill the cells.
- Open cell caps carefully, one by one.
- Look inside each cell to see the water level.
- Add distilled water if the plates are exposed.
- Fill just enough to cover the plates, or to the fill line if marked.
- Do not fill past the fill line.
- Replace caps tightly.
Preventing Golf Cart Battery Freezing
A discharged battery can freeze easily. Water in a dead battery turns to ice. This ice can expand. It can crack the battery case. A fully charged battery has a lower freezing point. This means it can withstand colder temperatures without freezing. This is why charging fully is so important. Store batteries in a place that does not get too cold. Ideally, keep them above freezing temperatures.
- Always keep batteries fully charged for winter.
- Store them in a warm place if possible. A garage is better than a shed.
- A fully charged battery resists freezing better than a dead one.
- Try to keep the storage temperature above 40°F (4°C).
Using a Golf Cart Trickle Charger in Winter
A trickle charger can keep batteries charged. It gives a small, steady flow of power. This stops batteries from losing charge over time. Use a smart trickle charger. It will turn on and off as needed. This prevents overcharging. Many people use a golf cart trickle charger winter setup. It’s a great way for long-term golf cart battery care.
- Connect the trickle charger correctly to the batteries.
- Follow the charger’s instructions for use.
- Check battery charge every few weeks if not using a smart charger.
- Some smart chargers can stay connected all winter without harm.
- Ensure the charger is meant for your battery type (e.g., 12V, 36V, 48V).
Table: Battery Winterization Summary
| Task | Why It Matters | How To Do It |
|---|---|---|
| Full Charge | Prevents deep discharge, lowers freezing point | Charge until charger light shows full capacity. |
| Disconnect Cables | Stops power drain from cart systems, saves battery. | Remove negative then positive cables from terminals. |
| Clean Terminals | Ensures good contact, prevents corrosion buildup. | Brush off corrosion, use baking soda mix, rinse. |
| Check Water Levels | Keeps plates covered, prevents damage (lead-acid). | Add distilled water to cover plates, do not overfill. |
| Store Warm | Prevents freezing, slows self-discharge rate. | Keep batteries in a warm spot, if possible (above 40°F). |
| Use Trickle Charger | Maintains charge, prolongs battery life over time. | Connect smart charger, monitor charge level monthly. |
Tire Care for the Off-Season: Electric Golf Cart Tire Storage
Tires need care too. Leaving them flat or with full weight can cause flat spots. This makes them bumpy to drive later. Proper electric golf cart tire storage extends their life. It saves you money on new tires.
Check Tire Pressure
Inflate your tires to the correct pressure. Check your cart’s manual for the right PSI (pounds per square inch). Over-inflating or under-inflating can cause issues. Correct pressure helps prevent flat spots. It helps tires keep their shape.
- Use a tire pressure gauge.
- Fill to the recommended PSI shown on the tire or in your manual.
- Check all four tires equally.
Raise Your Cart if Possible
If you can, raise your golf cart off the ground. Use sturdy jack stands. Place them under the frame. This takes the weight off the tires completely. It prevents flat spots from forming. If you can’t lift it, move the cart a few feet every few weeks. This changes where the weight sits on the tires. It helps to avoid permanent flat spots.
- Use sturdy jack stands designed for vehicles.
- Place them under the frame of your cart, not the axles.
- If not lifting, roll the cart a bit monthly. Just a few feet will do.
Checking Fluids and Moving Parts
Even electric carts have fluids. They need checking before winter. This is part of your off-season golf cart maintenance checklist. It ensures all parts are well-lubricated and safe.
Inspecting Brake Fluid
Brake fluid helps your cart stop safely. Check its level in the reservoir. Look for leaks around the brake lines and calipers. If the fluid is low, add more. If it looks dark or dirty, it might be time to change it. Consult your cart’s manual for the correct fluid type and service schedule.
- Locate the brake fluid reservoir. It’s usually a small plastic tank.
- Check fluid level against the min/max lines on the reservoir.
- Look for any signs of leaks or drips around the wheels.
Transaxle Fluid Check
The transaxle fluid lubricates gears in your cart’s “transmission.” It’s like oil for the drive system. Check its level. Some carts have a fill plug or dipstick. Make sure it’s at the right level. If it’s old or dirty, consider changing it. This helps keep your cart running smoothly.
- Find the transaxle fill plug or dipstick. Your manual will show you where.
- Check fluid level as per your cart’s manual.
- Look for fluid color and smell. It should be clear and not smell burnt.
Lubricating Moving Parts
Grease can prevent rust and wear on metal parts. Use grease on suspension points. Lubricate steering parts like tie rod ends. Check all moving joints and pivot points. Use a good quality grease. This keeps parts from seizing up. It makes your cart ride smoother and last longer.
- Find all grease fittings (sometimes called zircs). They look like small metal nipples.
- Use a grease gun to add grease to these fittings.
- Wipe away any extra grease that comes out.
- Lubricate hinges, pedals, and steering components manually.
Electrical System Safety
Beyond batteries, other electrical parts need care. This helps with preparing electric golf cart for cold weather. It prevents surprises when you want to use your cart again.
Disconnecting Accessories
Some carts have extra lights, radios, or other added parts. Disconnect these if they draw power. Even when turned off, they can cause a small, slow power drain. This stops any phantom drain. It keeps your main batteries healthier and fully charged.
- Unplug any added accessories.
- Check for switches that are left on for any accessories.
- Consider removing small accessory batteries if they are separate.
Inspecting Wiring
Look at all wires on your cart. Check for frayed or cracked insulation. Cold weather can make old wires brittle. They might crack easily. Replace any damaged wires right away. Make sure all connections are tight. Loose connections can cause power loss or even fire hazards.
- Scan all visible wires under the seat and dashboard.
- Look for cuts, cracks, bare spots, or melted insulation.
- Gently tug on electrical connectors to check tightness.
- Fix or replace any wires that look damaged.
Body, Seats, and Cover
Protecting the outside of your cart is also important. This prevents cosmetic damage. It keeps your cart looking good.
Cleaning and Protecting the Body
After washing, wax your cart. This adds a layer of protection to the paint. It repels water and dirt. It also makes cleaning easier next spring. Use a wax made for vehicles. Apply it by hand or with a buffer.
- Apply wax evenly across all painted surfaces.
- Allow it to dry to a haze.
- Buff to a shine with a clean cloth.
- Do this for all painted or fiberglass parts of your cart.
Caring for Seats and Upholstery
Clean your seats. Use a mild cleaner made for vinyl or your seat material. Protect them from cracking. Cold weather can make vinyl brittle. A vinyl conditioner can help keep them soft and flexible. Cover the seats to protect them from dust and pests.
- Wipe down seats with a damp cloth to remove dirt.
- Use a vinyl cleaner/conditioner if seats are vinyl.
- Place a protective cover over seats, like an old sheet.
Using a Golf Cart Cover
A good cover is a must for electric golf cart winter storage. It protects from dust, moisture, and pests. It shields your cart from scratches. Choose a cover that fits well. It should be breathable. This stops moisture from trapping inside. A non-breathable cover can cause mold or rust.
- Select a durable, breathable cover made for golf carts.
- Ensure it covers the entire cart, down to the tires.
- Secure it tightly so it doesn’t blow off in the wind.
- Check the cover periodically for tears or damage.
Picking the Right Storage Spot
Where you store your cart matters a lot. This impacts how well it lasts the winter. The right place helps prevent damage.
Ideal Storage Environment
A dry, secure place is best. A garage or a dedicated shed works well. Keep it away from direct sunlight. Sunlight can fade paint and damage rubber. Temperature control is ideal but not always possible. The main goal is to avoid freezing temperatures. This is vital for electric golf cart winter storage.
- Choose a dry, indoor spot. A garage is perfect.
- Protect from extreme cold temperatures.
- Keep the area clean and free from pests like mice.
- Ensure good air circulation.
Avoid Outdoor Storage
Do not store your golf cart outside if you can help it. Even with a good cover, outside storage is risky. Moisture from rain or snow can seep in. Wind can rip covers. Freezing rain and ice can cause damage. Pests can also find their way in more easily. Outdoor storage greatly increases the chance of rust, damage, and costly repairs.
- Outdoor storage greatly increases risk of damage.
- Weather damage (rust, cracks, faded paint) is more likely.
- Critters like mice can cause havoc by chewing wires or building nests.
Off-Season Golf Cart Maintenance Checklist
Here is a summary of all the important tasks. Use this list as your guide. Check each item off as you complete it. This off-season golf cart maintenance checklist helps you cover all bases.
| Task Category | Specific Action | Importance | Notes |
|---|---|---|---|
| Cleaning | Wash and dry entire cart thoroughly. | High | Removes dirt, prevents rust. |
| Inspect cart for any visible damage. | High | Spot problems early. | |
| Batteries | Fully charge all batteries to 100%. | Critical | Prevents freezing, maintains capacity. |
| Disconnect cables (negative first). | Critical | Stops parasitic drains, saves battery life. | |
| Clean battery terminals carefully. | High | Improves connection, prevents corrosion. | |
| Check water levels (lead-acid batteries). | High | Keeps plates covered, prevents damage. | |
| Use a smart trickle charger if possible. | Critical | Maintains charge over months of storage. | |
| Store batteries in a warm, dry place. | Critical | Prevents freezing, prolongs overall battery life. | |
| Tires | Inflate tires to proper PSI. | Medium | Prevents flat spots from forming. |
| Lift cart off ground or move often. | High | Takes weight off tires, avoids flat spots. | |
| Fluids | Check brake fluid level and condition. | Medium | Ensures braking system integrity and safety. |
| Check transaxle fluid level. | Medium | Protects gears, ensures smooth operation. | |
| Lubrication | Grease all moving parts and joints. | Medium | Prevents rust, ensures smooth movement next year. |
| Electrical | Disconnect any non-essential accessories. | Low | Reduces minor power drains on batteries. |
| Inspect all visible wiring for damage. | Medium | Prevents electrical failures, ensures safety. | |
| Body/Cover | Wax the cart’s body for protection. | Medium | Protects paint, repels moisture. |
| Clean and condition seats and upholstery. | Medium | Prevents cracking, keeps seats soft. | |
| Cover cart with breathable golf cart cover. | High | Protects from dust, moisture, pests. | |
| Storage Area | Store in a dry, secure, protected spot. | High | Avoids weather damage, theft, and pest issues. |
What to Do When Spring Arrives
When winter ends, you’ll want to use your cart again. Here’s a quick guide to getting it ready for action. It’s much simpler than winterizing.
Reconnect Batteries
Reconnect your battery cables. Start with the positive cable first. It’s usually red. Then connect the negative cable. It’s usually black. Make sure all connections are tight and clean.
Check Fluid Levels Again
Before driving, check all fluid levels one more time. This includes brake fluid and transaxle fluid. Top up if needed.
Inspect Tires
Check tire pressure again. Look for any flat spots or cracks. If you lifted your cart, lower it gently onto its tires. Inflate them to the correct pressure.
Test Drive
Take a short drive. Check brakes, steering, and lights. Listen for strange noises. Your well-winterized cart should run smoothly. If anything seems wrong, fix it before a long trip.
Frequently Asked Questions (FAQ)
Q: How cold is too cold for an electric golf cart battery?
A: Batteries lose power faster in cold. Below freezing (32°F or 0°C) is dangerous. Water inside a dead battery can freeze. A fully charged battery can handle colder temperatures better. But storing them below 32°F (0°C) for a long time can cause harm. Aim for storage above 40°F (4°C) if possible. This helps with preventing golf cart battery freezing.
Q: Can I leave my golf cart charger plugged in all winter?
A: Yes, if you use a smart trickle charger. A smart charger stops charging when the battery is full. Then it starts again when needed. This prevents overcharging. It is the best way for long-term golf cart battery care. Do not use a regular, non-smart charger plugged in constantly. This can overcharge and ruin batteries.
Q: How often should I check my golf cart battery charge in winter?
A: If you don’t use a smart trickle charger, check monthly. Charge them to full if they drop below 50%. A smart trickle charger means less checking. It keeps them topped up automatically. This helps with storing golf cart batteries in winter without much fuss.
Q: What if I don’t have a garage for winter storage?
A: It is best to store your electric golf cart indoors. If you must store it outside, use a high-quality, breathable cover. Elevate the tires if you can with jack stands. Disconnect and remove the batteries. Store the batteries indoors in a warm, dry place. This is crucial for electric golf cart winter storage outside, as batteries are most sensitive to cold.
Q: Can I just leave my golf cart plugged in all winter without disconnecting anything?
A: It’s not a good idea. Even when “off,” your cart has small power drains. This is called parasitic drain. Over months, this can deeply discharge your batteries. A deeply discharged battery can freeze and be ruined. Disconnecting cables, or using a smart trickle charger connected directly to the batteries (not through the cart’s system), is safer. This ensures proper golf cart battery winterization.
Q: Do I need special tires for winter golf cart storage?
A: No, you don’t need special tires. Just make sure your regular tires are inflated correctly. And take weight off them if possible. This prevents flat spots. Electric golf cart tire storage is mainly about preventing deformation of the tire’s shape.
Q: Should I remove the lead-acid batteries from the golf cart for winter storage?
A: You can, especially if your storage area is very cold. If you remove them, clean them well. Store them on a wooden pallet or block, not directly on concrete. Concrete can draw heat away. Keep them charged with a smart trickle charger in a warm, dry place. This is part of storing golf cart batteries in winter and can offer extra protection.
Q: How long does winterization take?
A: It might take a few hours. This includes cleaning, battery care, and other checks. The time spent depends on how dirty your cart is and how much maintenance it needs. It is time well spent. It ensures your cart is safe and ready for spring.
Q: What is the biggest mistake people make when winterizing?
A: The biggest mistake is not caring for the batteries. Allowing batteries to sit discharged in cold weather is very damaging. This leads to costly battery replacement. Proper golf cart battery winterization is the most vital step. Always charge them fully and keep them charged.
Q: Does winterizing an electric cart differ much from a gas cart?
A: Yes, the main difference is the power source. Electric carts focus heavily on battery care and electrical systems. Gas carts need fuel stabilizers, engine oil changes, spark plug checks, and fuel system draining. Both types need cleaning, tire care, and general protection from the elements. But the heart of winterization changes with the power type.